
Planning a podcast takes effort, but having a content calendar can make your workflow much smoother. A content calendar is like a roadmap for your podcast, helping you stay organized and consistent. If you’re wondering how to make a podcast calendar in Google Sheets, this guide will walk you through it step by step.
Why Use Google Sheets for Your Podcast Calendar?
Google Sheets is free, easy to use, and accessible from any device. It also allows you to collaborate with co-hosts or team members in real time. With just a little setup, it can become a powerful tool to organize your podcast episodes. You can use Google Sheets to create a guests calendar to help map your content during the year.
Step 1: Open a Blank Google Sheet
Start by heading to Google Sheets. If you don’t already have a Google account, you’ll need to create one—it’s free. Once in Google Sheets, open a new blank spreadsheet. Give your spreadsheet a name for proper documentation.

Step 2: Set Up Your Task Structure
One reason why many people would like to have a customizable podcast content calendar is that they can add a task list to have a solid system for their monthly calendar.
To create this, think of the details you may want to include. Some of the most commonly used headers are:
- Month
- Progress Summary
- Calendar Set Up
- Episode
Think about what details you’ll need for each podcast episode. Some common columns to include are:
- Episode Number: Helps you keep track of the order.
- Episode Title: The working title or final name of the episode.
- Release Date: When the episode will be published.
- Topic/Theme: The main focus of the episode.
- Guest(s): If you’re featuring any guests, list them here.
- Recording Date: When you plan to record the episode.
- Status: Track where the episode is in production (e.g., “Idea,” “Recording,” “Editing,” “Published”).
- Notes: Any extra information or ideas related to the episode.
Label these columns across the first row of your Google Sheet. You can bold these headers to make them stand out.

Step 3: Use a Dropdown Menu
Before marking the days and dates on your calendar, let’s make things easier by using dropdown menus to avoid typing the same information over and over.
For instance, under the “Calendar Set Up” section, you’ll see options like “Year” and “Week Start.” Wouldn’t it be handy to have a dropdown list for selecting the year or the day of the week?
Select the cells where you want the dropdown, then go to Insert > Dropdown and type in the choices you want to include.

Step 4: Add the Calendar
Add an automated calendar to make your template complete. Start by selecting some empty cells and merging them for a clean layout.
Next, enter the days of the week to kick off your calendar setup. For the first date, click on the merged cell and use this formula: =DATEVALUE(1&C9&C10). Here, C9 refers to the cell with your month dropdown, and C10 is for the year dropdown. This formula will help automatically generate the right date based on your selections.

You will get numbers instead of the month and year. To change it, click Format > Numbers > Custom Date and Time then choose your preferred format.

After that, create the automated dates. You can do this by using the =SEQUENCE function.
Use =SEQUENCE(1,1,F2-WEEKDAY(F2,1)+1)
Then, drag and copy the formula to the rest of the date fields.

The next step to fully automate the calendar is by using the ARRAY function. Click on the first day of the month and input the formula:
“=ARRAY_CONSTRAIN(IFERROR(FILTER($A$17:$A$57,$B$17:$B$57=H8),),4,1)”

Let’s say your dates are in A9:A28, and your descriptions are in B9:B28. To lock the range, simply click F4 on your keyboard.
If you’re working in Excel instead of Google Sheets, keep in mind that the ARRAY_CONSTRAIN formula isn’t available in Excel. But don’t worry—you can still achieve a similar result with this formula:
=IFERROR(INDEX($A$17:$A$34, SMALL(IF($B$17:$B$34=H8, ROW($A$17:$A$34)-MIN(ROW($A$17:$A$34))+1), ROW(1:1))), “”)
After entering the formula, press Ctrl+Shift+Enter (CSE) instead of just hitting Enter. This is important because the formula works as an “array” function in Excel and requires this key combination.
Once that’s done, you can start adding tasks and their due dates to see everything come together seamlessly!
Step 5: Add Dropdown Menus for Status
To make tracking episode progress easier, add dropdown menus for your “Status” column. Select all the cells in the “Status” column. Click “Insert” in the top menu, then choose “Dropdown” and type in your options, such as Recording, Editing, or Published. Click “Save.” Now, you can quickly update the status of each episode without typing it every time.

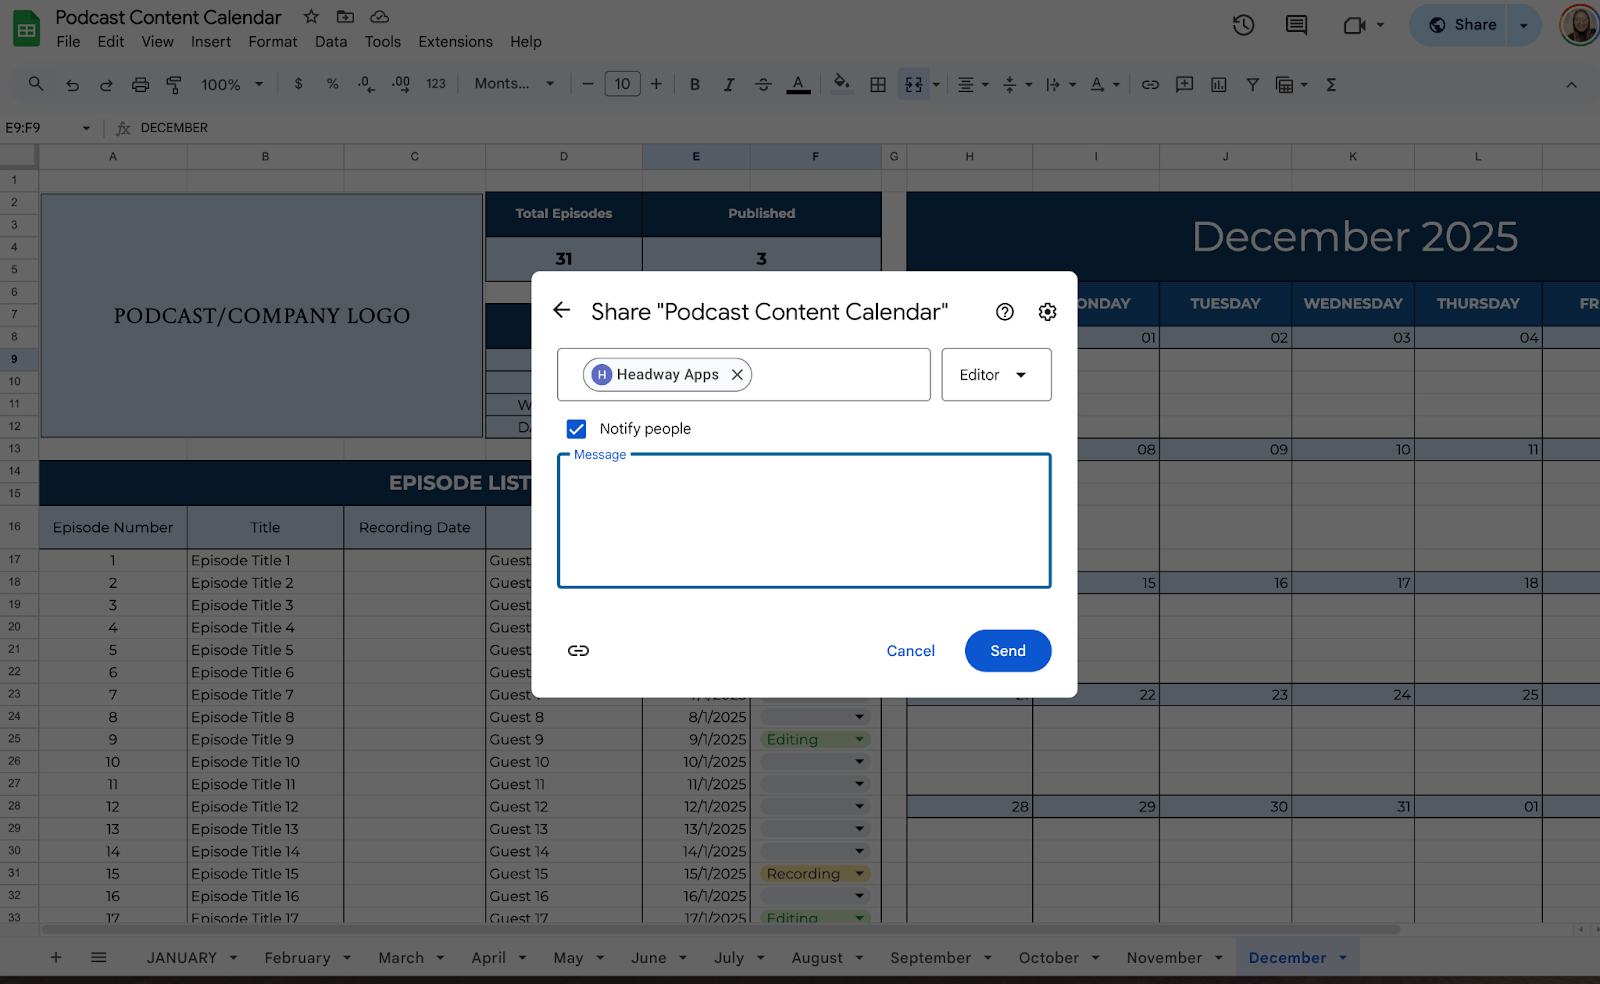
If you’re working with a team, share the calendar to keep everyone in sync. Click the green “Share” button in the top-right corner. Add team members’ email addresses. Adjust permissions (Viewer, Commenter, or Editor) based on their roles. Hit “Send.”
Get the Free Podcast Content Calendar Template
Get a copy of the free Podcast Content Calendar Template. I’ve populated some cells as examples, but you can customize them as needed.
Final Thoughts
A successful podcast doesn’t happen by chance—it’s the result of thoughtful planning and consistent effort. While tools like Google Sheets make organizing easier, it’s your creativity and commitment that will truly drive your podcast forward. Trust your ideas, stay flexible, and embrace the process as a learning experience.
Frequently Asked Questions
Use hashtags that are relevant to your content and audience. Mix popular hashtags with niche-specific ones to reach a broader audience while targeting your ideal followers. Avoid overly generic hashtags and choose ones that are trending or regularly used by your target community.
What is a good podcast posting schedule?
A good podcast posting schedule depends on your audience and the platform you use. Generally, consistency is key. For most platforms like Facebook, Instagram, and Twitter, posting 3-5 times per week is effective. However, it’s important to monitor engagement metrics to determine the optimal posting times and frequencies for your specific audience.
What formulas can I use to improve my content calendar?
Here are a few useful formulas:
- =TODAY(): Automatically inserts today’s date.
- =DATE(year, month, day): Pops a specific date into a cell.
- =TEXT(cell, “ddd, mmm d”): Formats dates more readably, like “Mon, Jan 1.”

