
Managing your bar’s inventory efficiently is crucial to running your business smoothly. Using Google Sheets, a free and user-friendly tool, you can create an inventory template that’ll help you track what you have, what you need, and what’s flying off the shelves.
Why Is It Important to Have a Bar Inventory Tracker?
A bar inventory tracker is essential because it helps keep a close eye on what you have in stock and what needs to be ordered. This ensures that popular drinks are always available for your customers and helps you spot any unusual changes in your inventory that might indicate a problem, such as over-pouring or theft.
Keeping track of every bottle helps you manage costs, improve profits, and make smarter decisions about which drinks to promote based on what’s selling. In short, a bar inventory tracker is a powerful tool for running a more efficient and profitable business.
Step 1: Open Google Sheets
First things first, you’ll need to go to Google Sheets. Once you’re in Google Sheets, click on the plus sign or “Blank” to open a new spreadsheet. Now you have a clean slate to start organizing your inventory.

Step 2: Set Up Inventory Categories
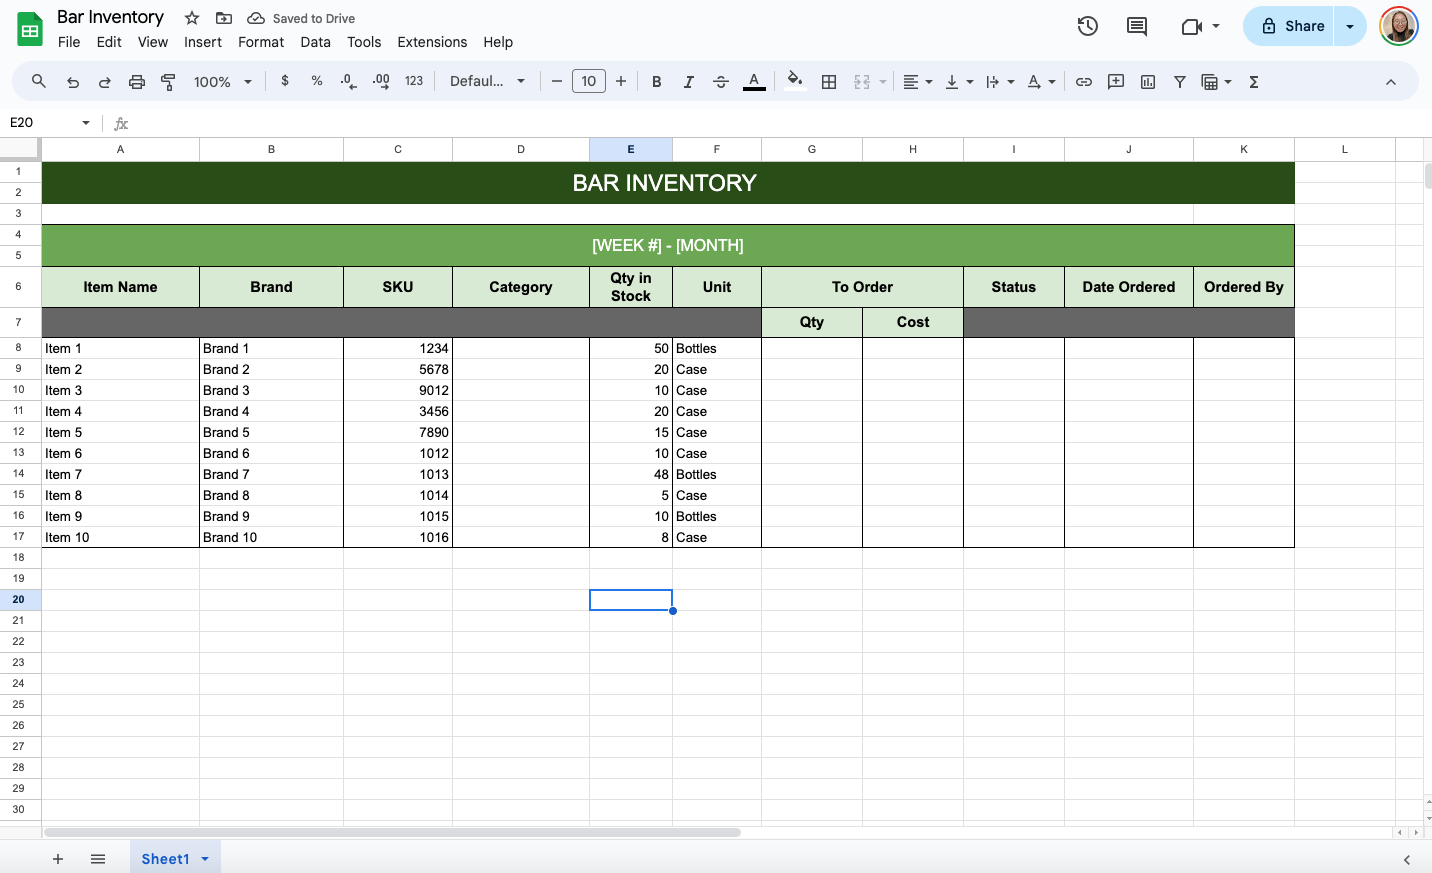
You’ll label the columns at the top of your spreadsheet with categories relevant to your inventory needs. For a basic bar inventory, typical categories are:
- Item Name
- Brand
- SKU
- Category
- Quantity in Stock
- Unit
- Order (Qty & Cost)
- Status
- Date Ordered

Step 3: Enter Your Inventory
With your labels set, it’s time to fill in the details. Under each appropriate header, list every item you have in your inventory. Take your time and be thorough.
Step 4: Use Dropdown Menu
Under Category label, you may want to add a dropdown list of recurring options. To do that, select the cells and click Insert > Dropdown. Once the sidebar is available, enter the options, such as Beer, Wine, Vodka, Whiskey, Tequila, and Brandy.

Step 5: Use Conditional Formatting
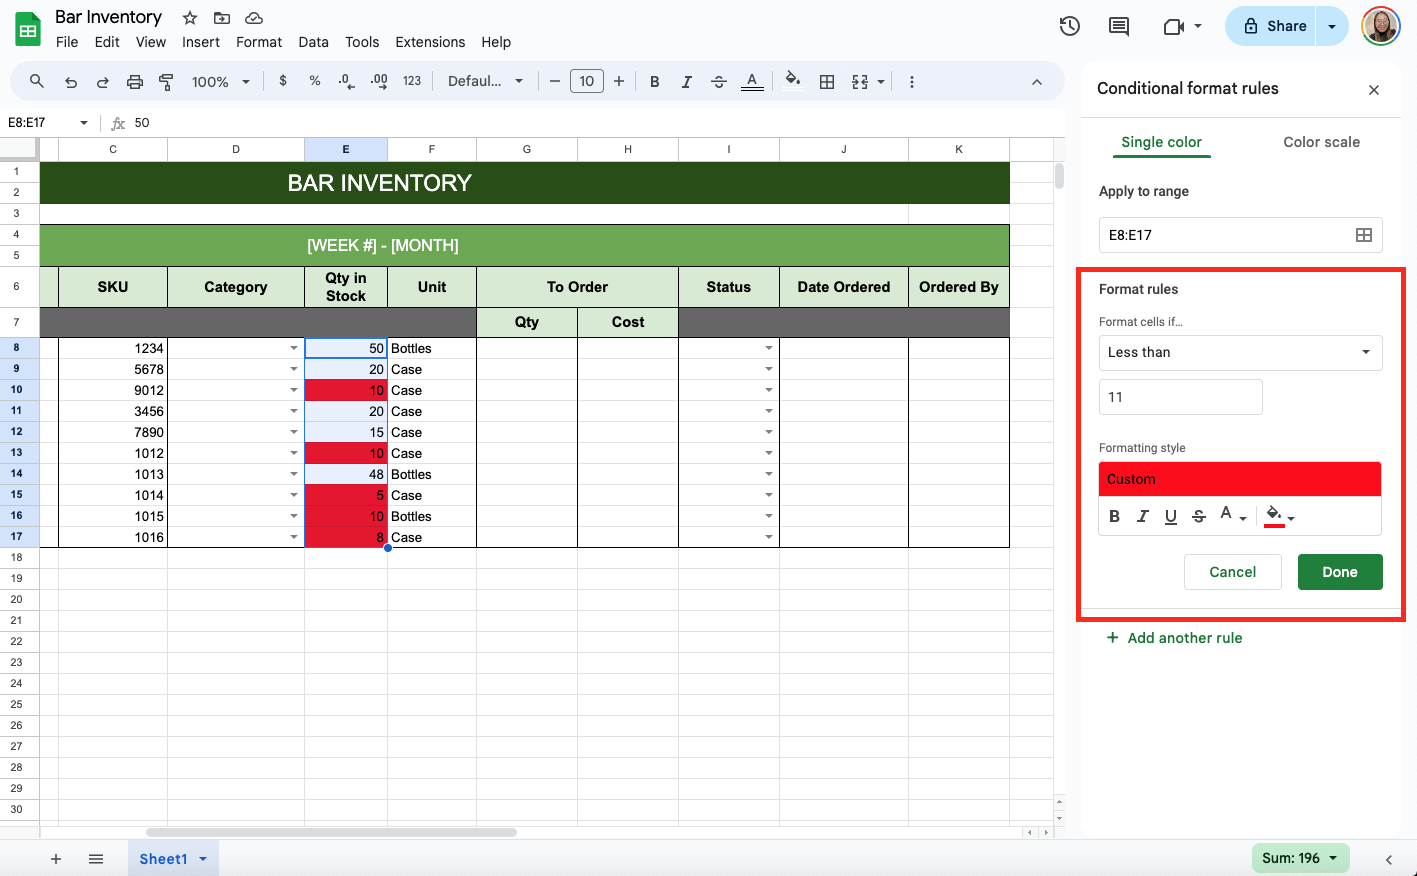
To easily know what item needs to be reordered, you can use Conditional Formatting. Click the cells under Qty in Stock then click Format > Conditional Formatting.

Then, click Format Rules and choose Less Than. Enter the value you need, for example, 11 and set the style, such as color.
Once your template is set up, share it with other managers or staff as needed using the ‘Share’ button in the upper right.

Get the free Bar Inventory Template
Get a copy of the free Bar Inventory template. I’ve populated the cells as examples, but you can customize them as needed.
Final Thoughts
Creating a bar inventory template in Google Sheets is a simple way to keep track of your stock and ensure that your bar runs smoothly. These steps guide you in building a personalized inventory system that suits your needs. Keeping it updated will help you avoid running out of stock and manage your bar more effectively.
Frequently Asked Questions
What should I do if I accidentally delete an important part of my inventory template?
Google Sheets has a version history feature, allowing you to revert to a previous version of the spreadsheet. To access it, go to File > Version history > See version history. From there, you can restore an earlier version of your template.
Is there a way to protect my inventory data from being changed by others accidentally?
To protect your data, you can lock specific cells or ranges to prevent accidental edits. Select the range, then go to Data > Protected sheets and ranges, and set the permissions for who can edit those cells.
The Bottom Line:
One keeps you awake. The other gets work done.
A month of coffee: $80
A month of FileDrop: $19
Why not have both?


