Organizing an event, whether a small get-together or a large wedding, requires meticulous planning, especially when keeping track of the guest list. Thankfully, Google Sheets offers a flexible and easy way to manage your guests, ensuring no detail is overlooked.
Why Is a Guest List Tracker Important?
A guest list tracker is important because it helps organize your event by tracking essential details such as who’s attending, contact information, and any special requirements like dietary restrictions. It ensures an accurate count of attendees, making planning for seating, food, and other logistics easier. Having everything in one place allows you to stay on top of changes, avoid oversights, and create a smoother event experience for you and your guests.
Step 1: Open a New Google Sheet
Go to Google Sheets. Once there, click “+ Blank” to open a new spreadsheet. Then, give your spreadsheet a proper title for better organization. In this example, I’ll use “Guest List Tracker.”

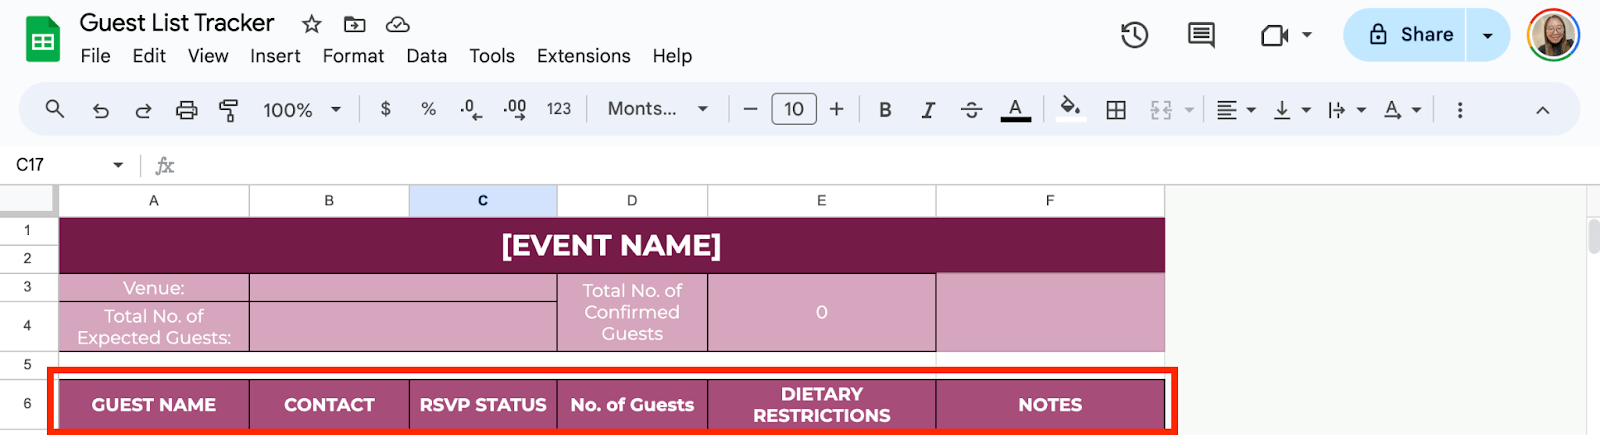
Step 2: Set Up Your Headers
In the top row, you’ll want to add headers to keep your guest list organized. Here are some suggestions:
- Guest Name
- Contact Information
- RSVP Status
- Number of Guests
- Dietary Restrictions
Feel free to add any additional columns that suit your event’s needs.
Step 3: Enter Guest Information
Start entering the information you have for each guest. Fill in the name, contact info (like phone number or email), and whether they’ve RSVP’d. Be sure to also note any dietary restrictions to ensure you can accommodate everyone’s needs.

Step 4: Add Drop-Downs for RSVP Status
To track whether guests are attending, you can create a drop-down menu in the RSVP column. Select the cells under the “RSVP Status” column and click Insert > Dropdown. Type in your options, such as “Yes and No,” and hit Save. Each guest row will have a drop-down menu where you can select their RSVP status.

Step 5: Calculate Total Guests
You can create a simple formula to calculate the total number of guests attending automatically. For instance, in a blank cell, use the following formula:
=SUMIF(C7:C21, “Yes”, D7:D21)
This will add up all the numbers from the “Number of Guests” column where the RSVP status is marked as “Yes.”

If you’re working with a team or need to share the guest list with others, click the Share button in the top-right corner of Google Sheets. You can enter their emails and choose whether they can edit or just view the sheet.

Get the Free Guest List Tracker
Get a copy of the free Guest List Tracker. I’ve populated some cells as examples, but you can customize them as needed.
Final Thoughts
Building a guest list tracker in Google Sheets is an easy and effective way to manage your event attendees. By following these simple steps, you’ll have a tracker that keeps everything organized, ensuring your event goes smoothly.
Frequently Asked Questions
Can I sort my guest list by RSVP status or other columns?
Yes, you can sort by any column by selecting the range of data and going to Data > Sort Range. Choose the column you want to sort by, such as RSVP status, to see all your confirmed, declined, or undecided guests grouped together.
Is there a way to categorize guests, such as ‘Family,’ ‘Friends,’ and ‘Colleagues’?
Yes, add a new column for ‘Category’ and designate each guest as ‘Family,’ ‘Friends,’ ‘Colleagues,’ etc. You can then use filters or Conditional Formatting to separate or highlight these categories easily.
The Bottom Line:
One keeps you awake. The other gets work done.
A month of coffee: $80
A month of FileDrop: $19
Why not have both?


