
Do you want to simplify your billing process? Creating a quick invoice template with auto-calculations in Google Sheets can save you time and hassle. With a few easy steps, you can set up a template that looks professional and calculates totals for you.
What Is an Invoice?
An invoice is a simple document businesses use to ask their clients for payment after providing goods or services. It includes details like what was sold, how much, and the agreed price.
Invoices help businesses keep track of sales, manage their stock, and make sure they file taxes correctly. They also set clear payment terms, such as when the client needs to pay, and often provide different payment methods.
Step 1: Open a New Google Sheet
Start by opening Google Sheets and click the “+” icon to open a blank sheet. Then, name your spreadsheet by clicking the Untitled Spreadsheet on the top corner of your empty sheet. In this example, I’ll use the “Quick Invoice Template.”
Step 2: Set Up the Basic Structure
Think of your invoice like a table. You’ll need a few key parts:
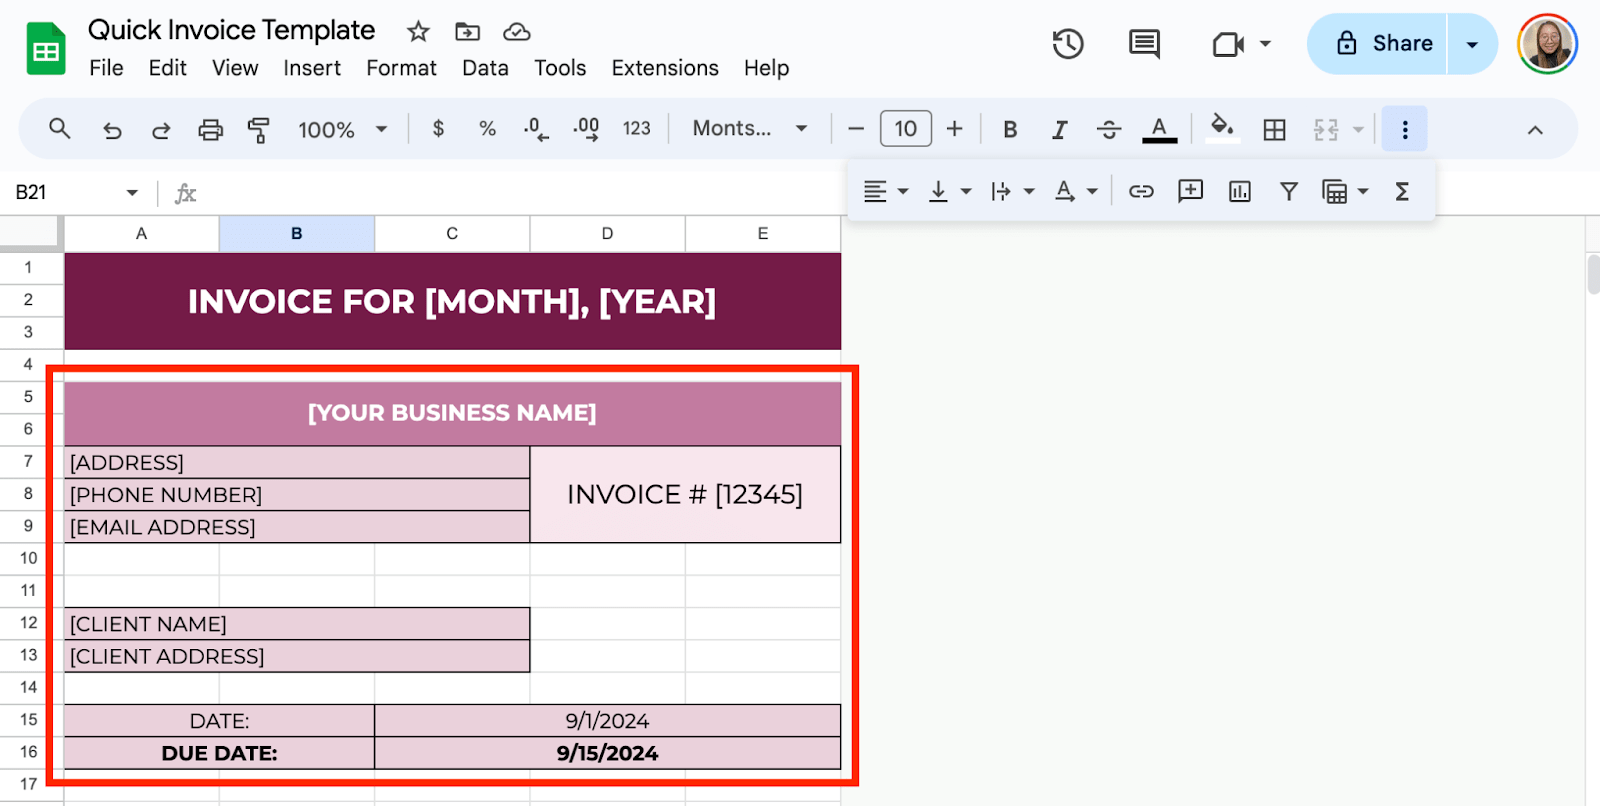
- Your business information: Include your business name, address, phone number, and email at the top left corner of the sheet.
- Client information: Below your business info, add a section for the client’s name, address, and contact details.
- Invoice details: Somewhere near the top right, include sections for the invoice number, date, and due date. These will help keep things organized.
Here’s how the first few rows might look:
Step 3: Create the Itemized List
Now that you’ve set up the basics, it’s time to build the main table where you’ll list your services or products.
Start with the following headers:
- Item Description
- Quantity
- Price Per Unit
- Total
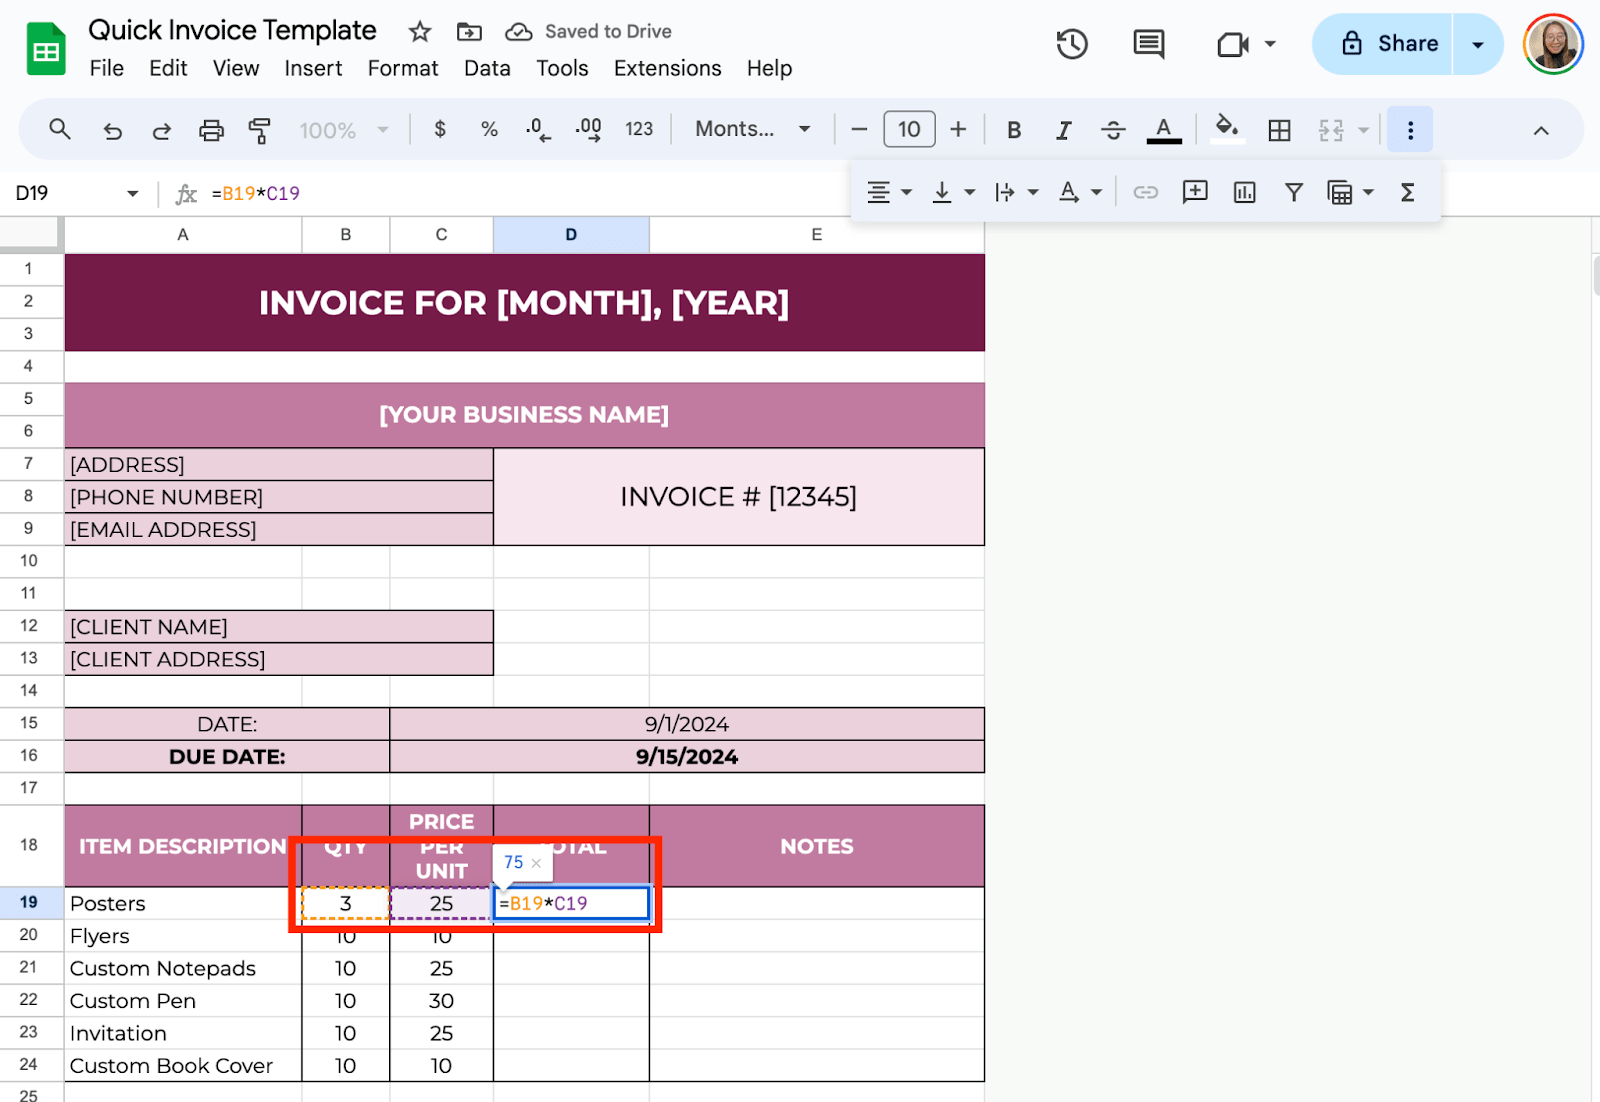
Leave space below each header for your items. It might look something like this:

Then, fill in the necessary information below every category.

Step 4: Add Auto-Calculations
Now comes the magic. Google Sheets will automatically calculate totals for you.
Calculate Row Totals
Under the “Total” column, add this formula:
=B19*C19
This formula multiplies the quantity by the price per unit. Copy and paste the formula into all the rows under the “Total” column.
Add Up All Totals
To get the overall total for the invoice, you’ll sum up all the amounts in the “Total” column. Below your list of items, write “Total Amount” and use this formula in the next cell:
=SUM(D19:D24)

Step 5: Add Tax and Other Fees (Optional)
If you charge tax or any other fees, you can add these to the bottom of your invoice:
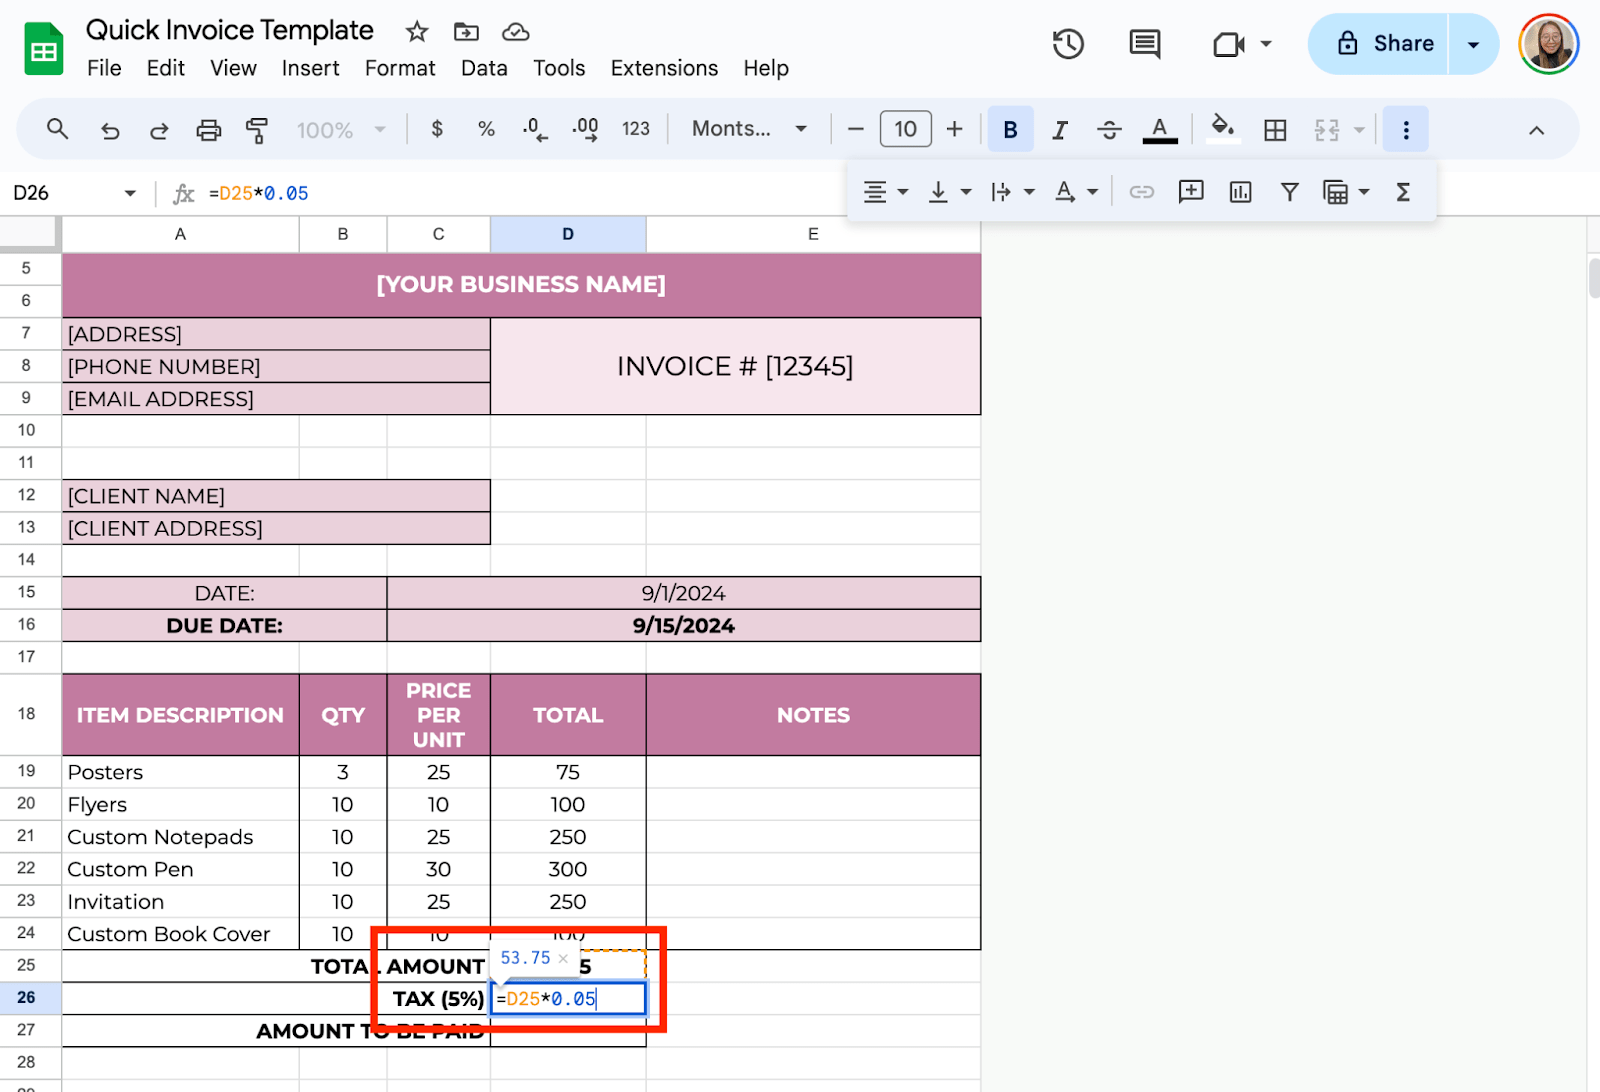
For tax, write “Tax (5%)” or the applicable percentage, and use this formula:
=Total Amount*0.05
Add the tax to your Total Amount using:
=Total Amount + Tax

Step 6: Format the Sheet for a Professional Look
To make the invoice more readable and professional:
- Bold important information like your business name, client details, and the “Total Amount.” Click “B” on the toolbar.

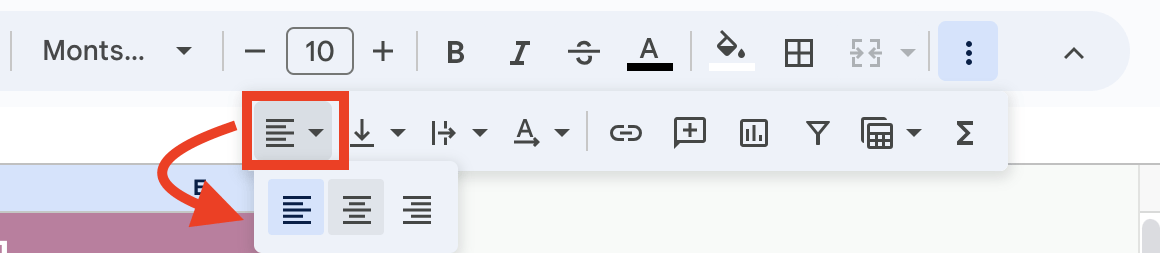
- Center-align the column headers (Item Description, Quantity, etc.) for a cleaner layout. Select the three dots and click the icon below:
- Use currency formatting for the price and total columns. Select the cells with amounts, click the “$” icon from the toolbar, and Google Sheets will format them as currency.

Once everything looks good, save the document. You can reuse it by simply opening the sheet, filling in the new details, and saving it as a new file. Aside from reusing, you can share it by clicking the “Share” button.

Get the Free Invoice Template
Get a copy of the free Invoice Template. I’ve populated some cells as examples, but you can customize them as needed.
Final Thoughts
Using Google Sheets to create an invoice template is simple and time-saving. You don’t need fancy software—just follow these steps to make a professional invoice with auto-calculations, perfect for businesses looking to streamline their process.
Frequently Asked Questions
Can I apply discounts to my invoice?
To apply a discount (for example, 5% off), use: =Total Amount – (Total Amount*0.05) This reduces the total by 5%.
How can I protect my Google Sheets invoice template from being edited accidentally?
To prevent accidental changes, select the cells or ranges you want to protect. Right-click and choose “Protect range.” Assign a name to the protected range, and set permissions so only you or specific collaborators can edit it.
What happens if I need multiple currencies in my invoice?
Google Sheets allows you to set different currencies for different cells. Select the cell or column.
Click “Format” > “Number” > “More Formats” > “Custom currency.” Choose the currency symbol you need, and the values will be formatted accordingly.
The Bottom Line:
One keeps you awake. The other gets work done.
A month of coffee: $80
A month of FileDrop: $19
Why not have both?


