If you’re managing a small business or just organizing a group event, keeping track of orders can sometimes feel overwhelming. Wouldn’t it be great if you had a tool that made this job easier? Google Sheets can help you achieve this with a simple but effective order form template.
Why Your Business Should Have an Order Form?
An order form is a simple yet useful tool that keeps your business organized and your customers happy. It streamlines the buying process, reduces mistakes, and ensures you have all the details needed to fulfill orders smoothly. Plus, a professional order form shows customers that you’re reliable and care about providing great service.
Step 1: Open Google Sheets
Open Google Sheets and click on the blank spreadsheet to start. Give your sheet a name so you can find it easily later—something like “Order Form Template.”

Step 2: Set Up Your Columns
Think of your columns as the sections of your order form. Typical columns might include:
A: Order Number
B: Customer Name
C: Product/Service
D: Quantity
E: Price Per Item
F: Total Price
G: Notes
Label the first row with these column names so that you know what’s going where.

Step 3: Format the Sheet
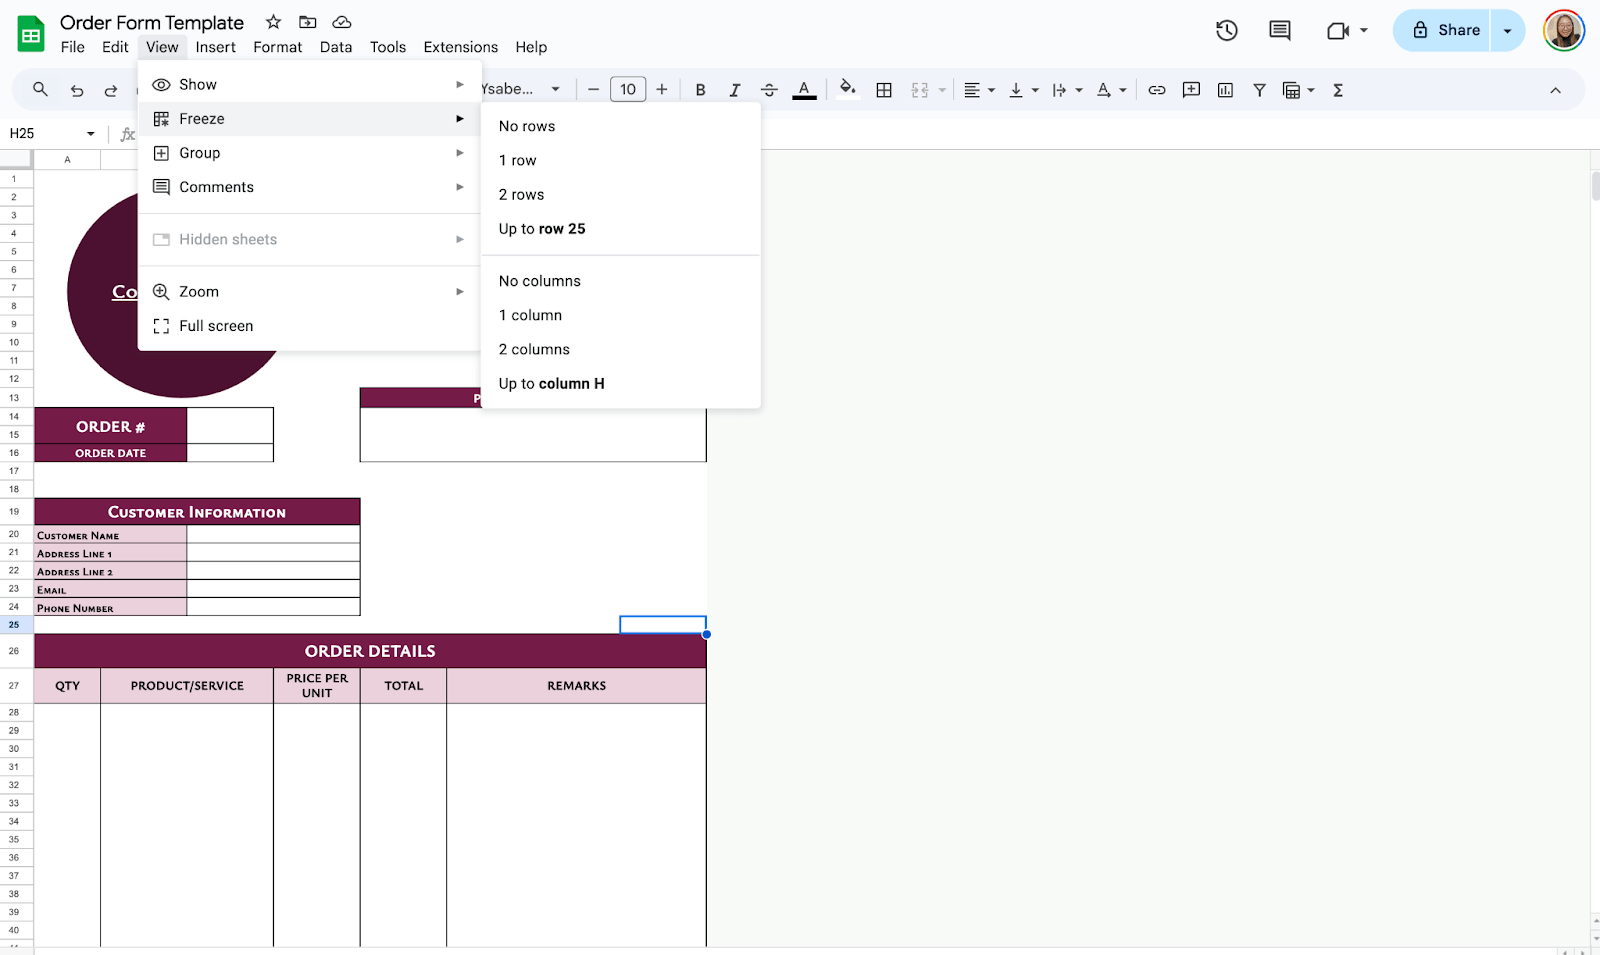
Make it easy to read by formatting your headers. Highlight the first row, then click on Bold in the toolbar or use the shortcut Ctrl + B (Windows) or Cmd + B (Mac). You can also freeze this row by going to View > Freeze > 1 Row so it doesn’t scroll out of view.

Step 4: Add Drop-Down Lists
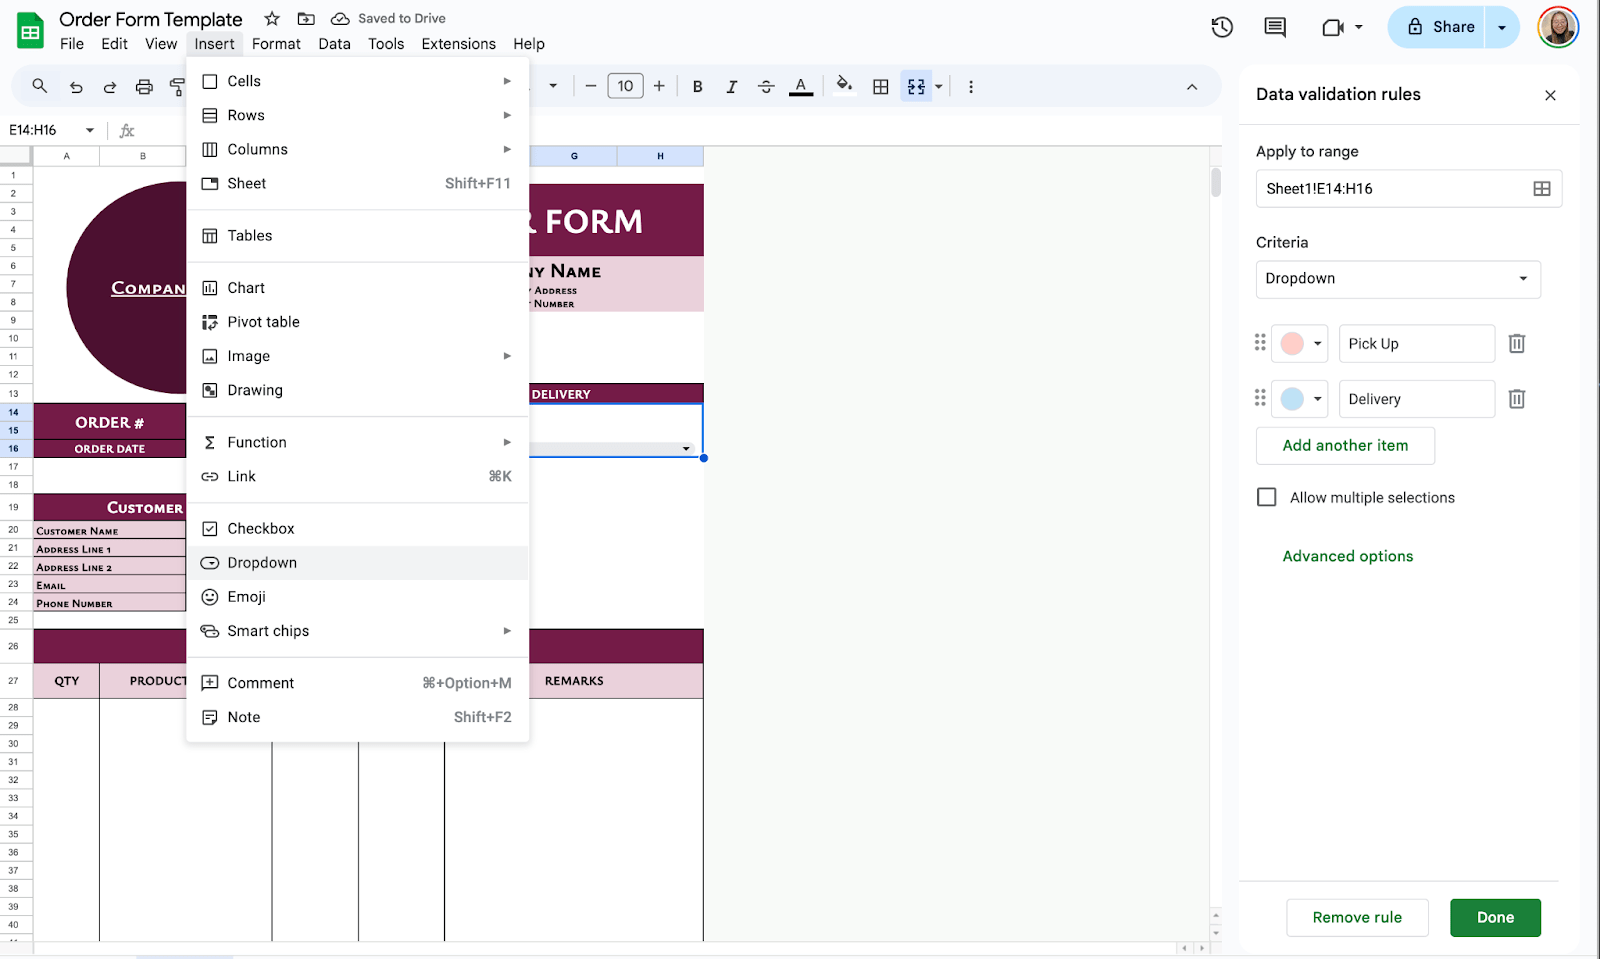
To save time, you can create a drop-down list for your services. Highlight the column where you’ll enter the dropdowns, then click Insert > Dropdown. Once the sidebar appears, you may now enter the options, for example, Pick-Up and Delivery.

Step 5: Use Formulas for Automatic Calculations
You may now start adding your information to try the automatic calculations.
To calculate the total price automatically, click on the first empty cell under the Total Price column. Enter the formula =D2*E2 (Quantity × Price Per Item). Press Enter, then drag the small square at the corner of the cell down the column to copy the formula for all rows.

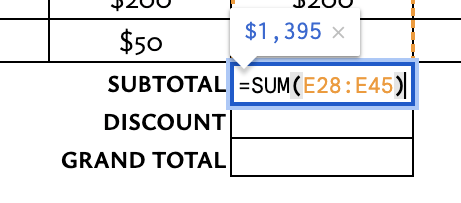
You may also add Sub-Total, Discount, and Grand Total field at the bottom part of your table.
To get the Subtotal, use the =SUM function:

To get the Grand Total, you may use the DIFFERENCE function where you will subtract the discount and subtotal fields:

Step 6: Add Visual Appeal
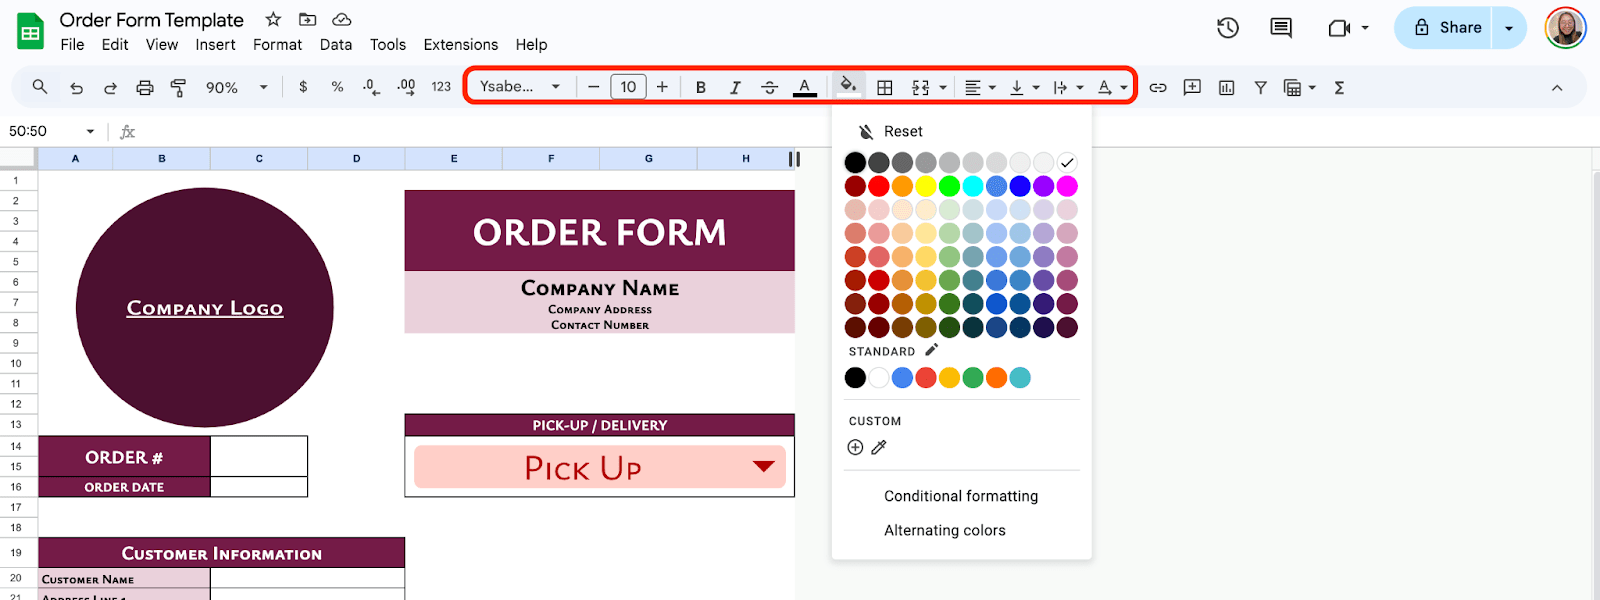
To make your form more appealing, use color shading for headers and sections to separate them visually. Apply borders around cells by selecting the range and clicking on the border icon in the toolbar.

Once your form is ready, you can share it digitally. Click Share in the top-right corner and choose your sharing preferences.

Get the Free Custom Order Form Template
Get a copy of the free Custom Order Form Template. I’ve populated some cells as examples, but you can customize them as needed.
Final Thoughts
Creating a customized order form in Google Sheets isn’t just about making things more efficient. It’s also a way to add a personal touch to your business.
What’s great about Google Sheets is how flexible it is. You can tweak and improve your form as your needs change. So go ahead, and play around with different layouts, formulas, and features. The more you get to know the tool, the better it will work for you.
Frequently Asked Questions
Can I automate price calculations?
Yes, use a formula in the Total Price column. For example, in cell F2, enter =D2*E2 to multiply quantity (D2) by price per item (E2). Drag the formula down the column to apply it to all rows.
What formulas can enhance my order form?
Besides basic multiplication (=D2*E2), you can use:
- SUM: =SUM(F2:F10) to calculate the total order value.
- IFERROR: =IFERROR(D2*E2, “”) to hide errors when cells are blank.
- COUNTA: =COUNTA(A2:A10) to count filled order rows.
Is it possible to lock certain cells to prevent editing?
Yes, you can protect specific cells. Select the cells you wish to lock. Go to “Data” and choose “Protected sheets and ranges.” Click “Add a range,” set permissions, and choose who can edit the data. Click “Done” to apply the protection.
The Bottom Line:
One keeps you awake. The other gets work done.
A month of coffee: $150
A month of FileDrop: $19
Why not have both?


