When managing HR processes, document collection can easily become a time-consuming headache. New hire paperwork, policy acknowledgments, compliance documents, training certificates — they all need to be collected, organized, and stored securely.
The problem?
- Email attachments clutter inboxes and create security risks
- Shared drives require manual setup and often confuse employees
- Physical drop-offs slow down the onboarding or compliance process
With FileDrop, HR teams can create a branded, secure upload form in minutes that sends files directly into an organized Google Drive folder — no logins or technical headaches for employees.
In this guide, we’ll show you step-by-step how to create an HR document upload form, brand it for your company, and connect it to Google Drive so submissions are automatically organized.
Why HR Teams Need a Secure Document Upload Form
An HR document upload form solves common challenges:
- Faster onboarding – Employees can submit ID scans, contracts, and tax forms instantly
- Better organization – All files go into the right folder without manual sorting
- Security compliance – Documents are transferred over encrypted connections
- No storage limits – Backed up to your connected Google Drive automatically
Whether you’re onboarding one employee or managing annual policy updates for hundreds, FileDrop makes the process smooth, secure, and error-free.
Step-by-Step: Building Your HR Document Upload Form in Minutes
These steps will walk you through creating a secure, branded HR upload form that stores submissions directly in Google Drive.
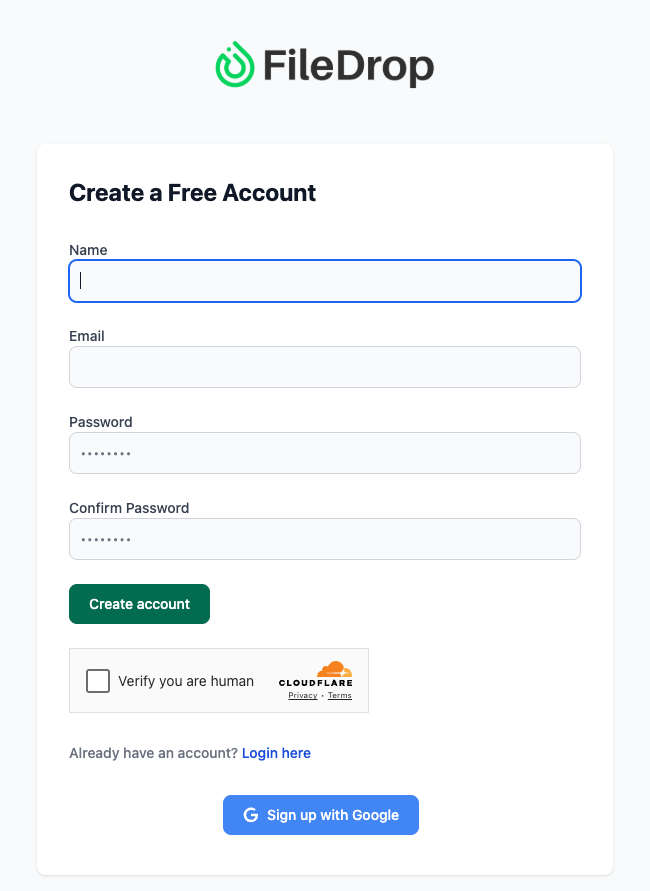
Step 1: Create Your FileDrop Account
- Go to https://app.getfiledrop.com/register.
- Sign up using your work email for best security and management control.
- Alternatively, sign in with your Google account to skip the password step.
- Check your inbox for a verification email (if prompted) and confirm your account.
Pro Tip: Use a dedicated HR email like hr@yourcompany.com for the account. This keeps the form separate from your personal or general admin accounts and makes it easier for multiple HR team members to access.
Step 2: Access the File Forms Dashboard
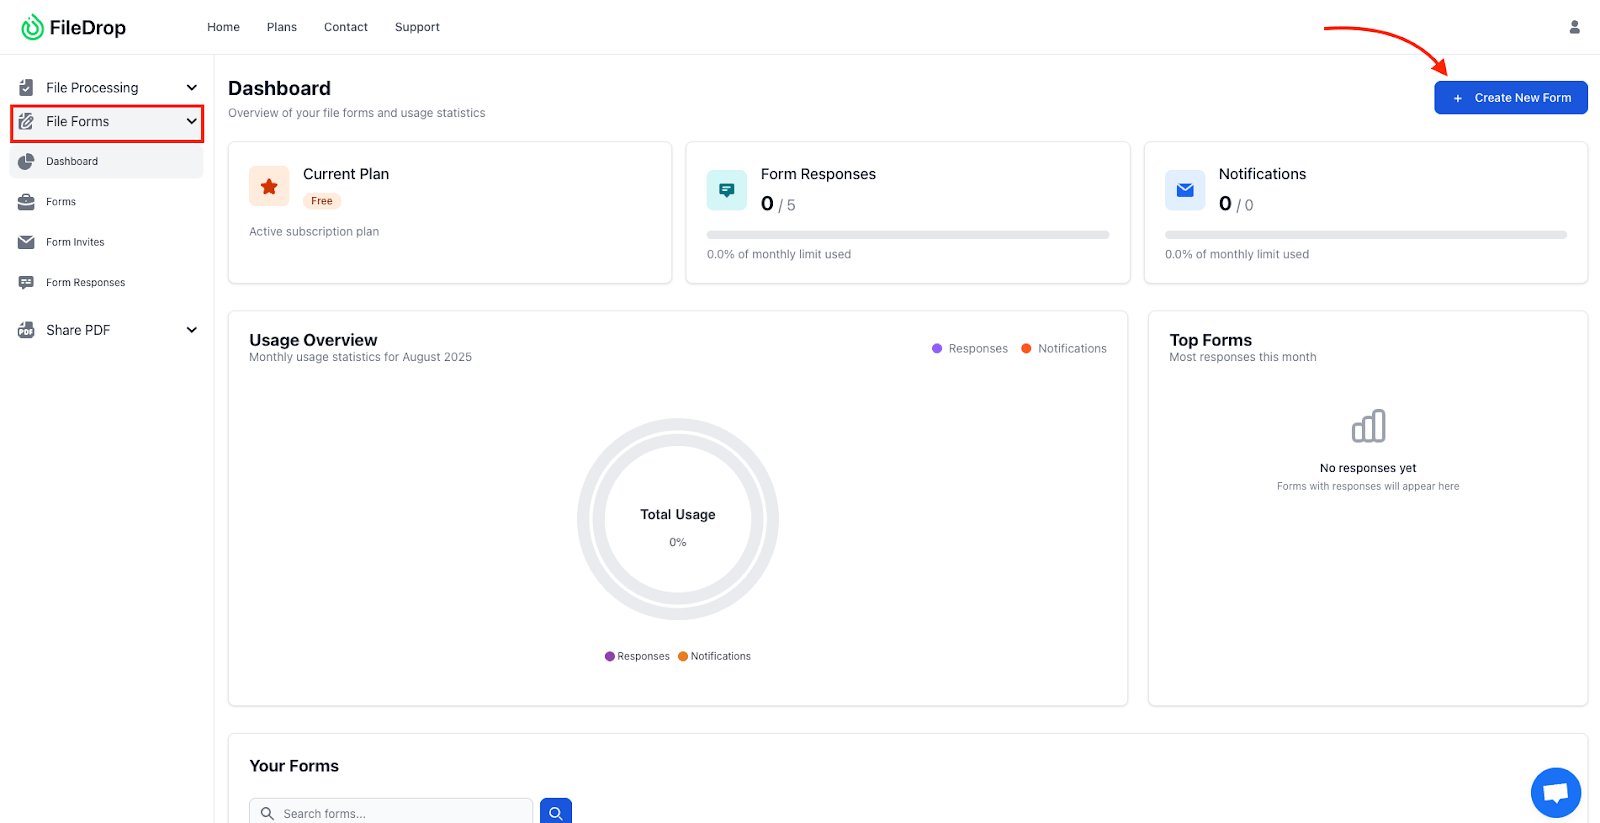
- After logging in, look at the left-hand navigation panel.
- Click on File Forms — this is where you’ll create, edit, and manage your upload forms.
- If it’s your first time, your dashboard will be empty. Later, you can have multiple forms for different HR processes (onboarding, leave applications, certification uploads, etc.).
Best Practice: Keep one form per document type or process. For example, “Annual Compliance Certificates” can be separate from “New Hire Documents” so submissions stay grouped by purpose.
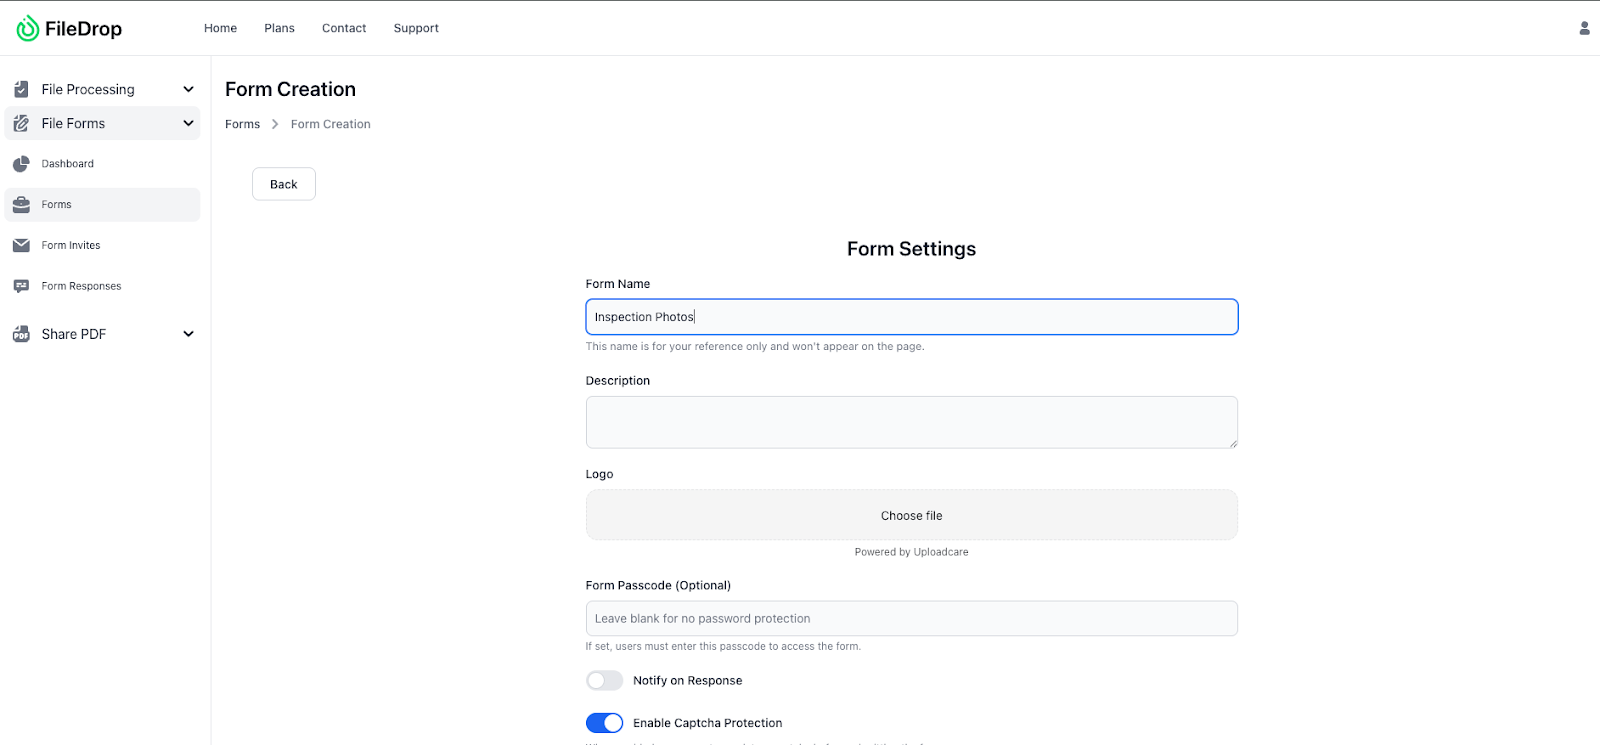
Step 3: Start a New File Form
- Click New File Form in the top right.
- Give your form a clear and specific name:
- “New Hire Document Submission Form – HR”
- “Annual Employee Certification Upload”
- “Policy Acknowledgment Form”
- Decide whether to enable separate submission folders. For HR, this should almost always be turned on. It automatically creates a new folder per submission, named with the employee’s info, so you don’t have to sort later.
Workflow Tip: If your HR team prefers one central folder with subfolders, enable separate folders here. You’ll thank yourself when onboarding multiple hires at once.
Step 4: Connect Your Google Drive
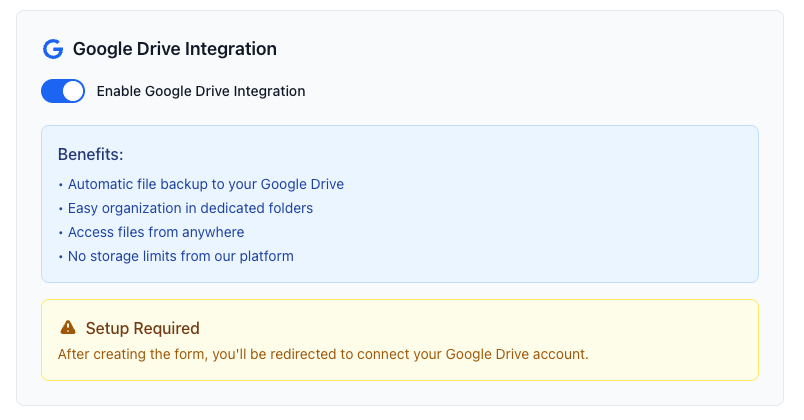
- In the form setup, scroll to the Google Drive Integration section.
- Click Connect Google Drive and authorize FileDrop to access your account.
- Pick a specific HR folder in Drive where all submissions will be stored.
- If you don’t have one yet, create it first in Drive with a structure like:
| Google Drive └── HR Documents ├── New Hires ├── Certifications └── Policy Acknowledgments |
- Select your chosen folder and confirm.
Why This Step Is Critical:
- Files are instantly backed up in your Google Drive.
- FileDrop has no storage limits — your Drive handles that.
- You can access them from anywhere without logging into FileDrop.
Step 5: Add Instructions and Customize Branding
This is where trust is built — employees are far more likely to use a form that looks official.
- Match your corporate colors for headers, buttons, and text highlights.
- Add a headline that makes the form’s purpose clear, e.g.:
- “Secure HR Document Upload”
- “Submit Your Employee Files”
- Add short, reassuring instructions in plain language:
- “Use this secure form to send your HR documents. Files are encrypted in transit and stored in our Google Drive. You don’t need a Google account to use this form.”
Pro Tip: Keep instructions concise but address security — HR forms often involve sensitive data, and reassurance increases completion rates.

Step 6: Add Employee Information Fields
Your upload form should capture key details before they upload files.
- Click Add Field for each information requirement:
- Full Name (required)
- Department / Team (required)
- Employee ID (optional, but useful for large companies)
- Email Address (required for follow-up)
- Document Type (dropdown list — e.g., “Signed Contract,” “ID Proof,” “Policy Form”)
- Make essential fields mandatory to avoid incomplete submissions.
Time-Saver: Adding a “Document Type” dropdown helps you quickly filter in Drive when searching later.

Step 7: Configure the Upload Section
- Add a File Upload field.
- Enable multiple file uploads so employees can send several documents at once (ID, tax form, contract, etc.).
- If needed, set file type restrictions — for HR, allowing PDF, DOCX, JPG, PNG covers most needs.
- Optional: Add a note like “You can upload up to 10 files in one submission.”
Best Practice: Encourage employees to name files clearly before upload, e.g., “Jane_Doe_ID.pdf” instead of “scan123.pdf.”
Step 8: Add a Strong Call-to-Action (CTA)
- Change the Submit button text to be specific:
- “Upload to HR”
- “Send My Documents”
- Ensure the form flow is:
- Employee fills personal info
- Employee uploads documents
- Employee clicks submit
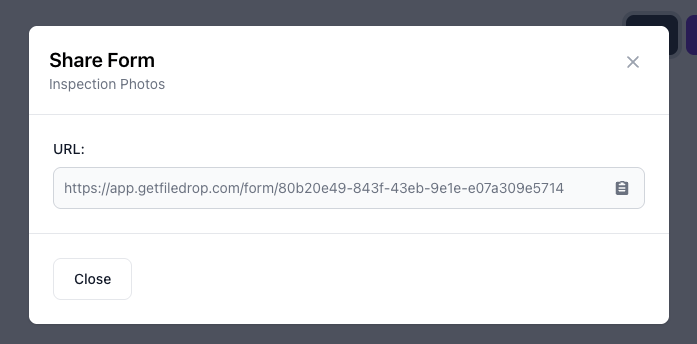
Once ready, you can distribute the form link in multiple ways:
- Email – Include it in onboarding packets or compliance reminders.
- HR Portal / Intranet – Add a permanent link for ongoing use.
- Slack or Microsoft Teams – Send in HR channels.
- QR Codes – Post in HR office or onboarding rooms for quick mobile uploads.
Tip: Always share the form link with a brief explanation so employees know exactly what to do and why.
Step 10: Manage and Review Submissions
- Each new submission instantly appears in your Google Drive folder.
- If “separate folders” is enabled, you’ll see each submission organized automatically.
- Open and review the files to ensure completeness.
- Move verified documents to long-term storage folders in Drive.
Efficiency Tip: Use Google Drive search with “Folder name: Employee Name” to quickly locate specific files later.
Step 11: Send Submissions to Google Sheets Automatically
One of FileDrop’s most useful features is its one-click export to Google Sheets. This ensures that every form submission — including employee name, department, document type, and upload date — is recorded in real time in a central spreadsheet.
Here’s how:
- In your FileDrop dashboard, find the HR Document Upload Form you just created.
- Click the Google Sheets icon next to your form.
- You’ll see a prompt: “This will create a Google Sheet with your form data. Continue?”
- Click Continue.

- FileDrop will automatically generate a new Google Sheet containing:
- All text fields you added to the form (e.g., Employee Name, Department, Email)
- The Document Type submitted
- The Upload Date
- A clickable link to the uploaded file stored in your connected Google Drive
- Going forward, every new submission will appear instantly in the sheet, giving HR an up-to-date log without manual data entry.
Tip: You can share this Google Sheet with your HR team or department managers so they can view submissions without accessing the FileDrop dashboard.

Example: HR Onboarding in Action
Let’s say you’re onboarding five new employees this month.
- You send them a single FileDrop link for “New Hire Document Submission”
- They fill out their name, department, and upload their signed contracts, ID scans, and tax forms
- Within seconds, all files are stored in your HR Google Drive folder — neatly organized into separate folders by employee name
Result: Zero email attachments, no manual sorting, and a faster, stress-free onboarding process.
FAQs
1. Can employees submit multiple files at once?
Yes. Employees can upload multiple documents in one submission — perfect for sending contracts, IDs, and certifications together.
2. Do employees need a Google account to upload files?
No. Employees simply click the link, fill in the fields, and upload — no Google login required.
3. Is FileDrop secure enough for sensitive HR files?
Yes. FileDrop uses encrypted file transfers, so documents like IDs and contracts are kept private and secure during upload.
The Bottom Line:
One keeps you awake. The other gets work done.
A month of coffee: $150
A month of FileDrop: $19
Why not have both?
