Planning an event can be stressful, but having a well-organized schedule tracker can make everything run smoothly. With Google Sheets, you can create a customizable event schedule that helps you keep track of all the details in one place.
Why Is an Event Schedule Tracker Important?
An event schedule tracker is essential because it’s like a roadmap guiding you through the planning and execution of an event. It helps keep track of all the tasks, deadlines, and responsibilities, ensuring nothing gets missed and everything unfolds smoothly.
Having all important information in one easy-to-access place saves time, reduces stress, and makes it simple for the entire team to see what needs to be done and when. This way, everyone stays on the same page, and the event has a better chance of success and enjoyment for everyone involved.
Step 1: Open Google Sheets
First, go to Google Sheets. Once logged in, open a new blank spreadsheet from the template gallery.

Step 2: Name Your Spreadsheet
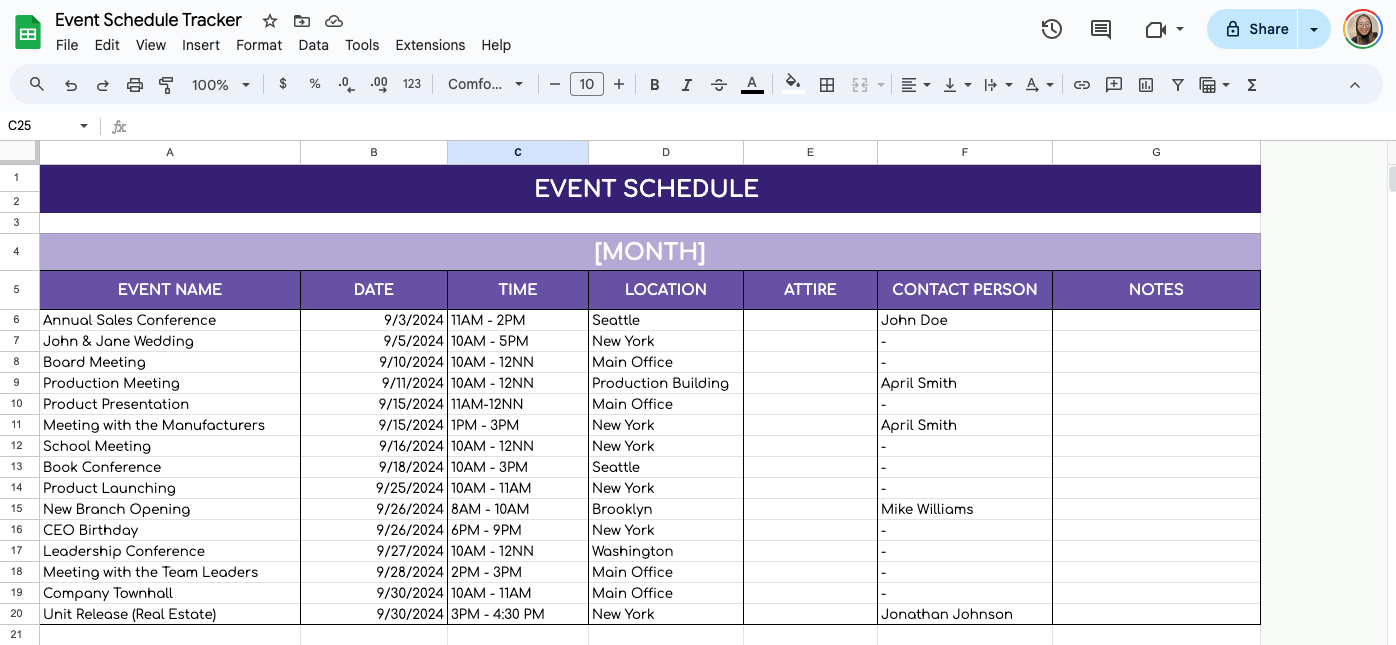
Click on the untitled spreadsheet at the top and give it a relevant name, such as “Event Schedule Tracker.”

Step 3: Create Your Headers
You must make headers at the top of your sheet to organize your event data. Typical headers might include:
- Event Name
- Date
- Time
- Location
- Attire
- Contact Person
- Notes
You can adjust these based on what’s most important for your events.

Step 4: Enter Your Event Data
Now, start entering the details of each event below the respective headers. For example, under “Event Name,” you might list “Annual Sales Conference.” Fill in the rest of the information across the row.
Step 5: Use Dropdown Menu
You can use a dropdown menu for columns that require recurring answers or options, such as the Attire column. To add a dropdown menu, select the range where you want to place it then click Insert > Dropdown.

Now, add the options you may need, such as Casual, Formal, Smart Casual, and Semi-formal.

Step 6: Formatting for Clarity
Consider formatting your headers to make your tracker easy to read. Highlight the first row, then click on the “Bold” button. You can also change the background color of the header row by clicking the “Fill color” button.

Google Sheets can automatically format dates and times to organize them. Just enter the date and time normally, then select the cells. Go to Format -> Number -> Date or Time, and choose your preferred format.

Step 7: Add Filters for Easy Sorting (Optional)
Adding filters will be very handy to quickly sort your events by date, name, or any other header. Click on Data in the menu, then select “Create a filter.” Small filter icons will appear in your header cells, which you can click to sort or filter your list according to that column.

Step 8: Conditional Formatting (Optional)
For added visual management, you can use conditional formatting to highlight past events in a different color. Select your ‘Date’ column except for the header.
Go to Format -> Conditional formatting. Under “Format cells if,” select “Date is before” and then “Today.” Choose a background color for past events and click “Done.”

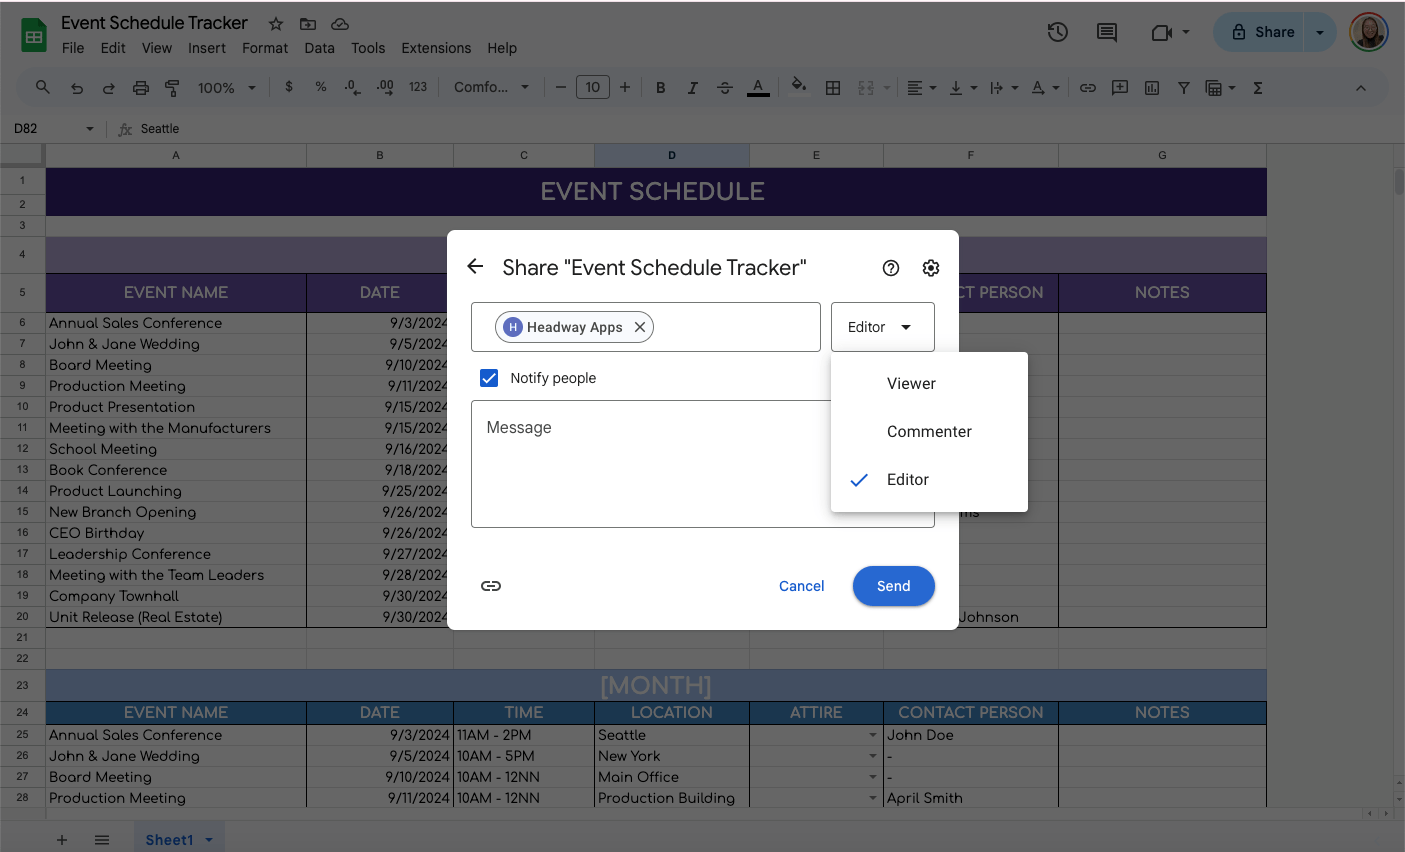
Step 8: Sharing and Collaboration
Managing events often involves teamwork. Google Sheets makes it easy to share your tracker. Click the “Share” button in the upper right corner, and enter the email addresses of your team members. Decide if they can view, comment, or edit, then send the invites.
Get the Free Event Schedule Tracker
Get a copy of the free Event Schedule Tracker. I’ve populated some cells as examples, but you can customize them as needed.
Final Thoughts
Using Google Sheets to build your event schedule tracker keeps you organized and ensures your team stays aligned with planned activities. These steps will give you a flexible, collaborative tool to manage multiple event schedules efficiently.
Frequently Asked Questions
Can I link my event tracker in Google Sheets to other documents or sheets?
You can link cells across different sheets or documents. Use formulas like =IMPORTRANGE(“spreadsheet_url”, “range_string”) to bring data from other sheets. This is particularly useful if you manage multiple related trackers across different sheets.
Can I automatically back up my event schedule tracker?
Google Sheets automatically saves and backs up your work to Google Drive continuously. You can access version history by clicking on “File” > “Version history” to see previous versions and revert changes if necessary.

