HR teams handle a constant flow of documents during employee onboarding — signed contracts, IDs, tax forms, NDAs, policy acknowledgments, and certifications. When these files arrive through email attachments or chat messages, they quickly become hard to track, hard to sort, and even harder to store securely.
With FileDrop File Forms, you can automatically organize every new hire submission into a clearly labeled folder in your Google Drive — no manual downloading, no dragging files into subfolders, and no inbox clutter.
This guide will walk you through how to set up a simple HR onboarding upload form that sends every employee’s files into a neatly organized Google Drive structure. A free folder naming template is included at the end.
Why HR Teams Should Automate File Collection and Organization
Manually managing HR documents comes with hidden costs. Here’s what FileDrop + Google Drive automation solves:
| HR Challenge | Automated Outcome with FileDrop |
| Documents received via email, chat, different formats | One secure upload page for all incoming HR files |
| HR must manually save and rename files | Files saved directly to Drive with clean naming conventions |
| Teams forget to create folders for each employee | FileDrop auto-generates a labeled folder per submission |
| Version control issues with contracts and forms | All versions stored in a single structured Drive system |
| Time wasted locating employee files for audits | Google Sheets tracking with clickable links for every file |
Step-by-Step Setup: Automate HR File Organization Using FileDrop
Follow these steps to build a clean, automated onboarding document system.
Step 1: Create a Free FileDrop Account
Start by visiting: https://app.getfiledrop.com/register
You can sign up using your work email or your Google account. No payment details are needed, and setup takes less than a minute. Once your account is created, you’ll land on the FileDrop dashboard.
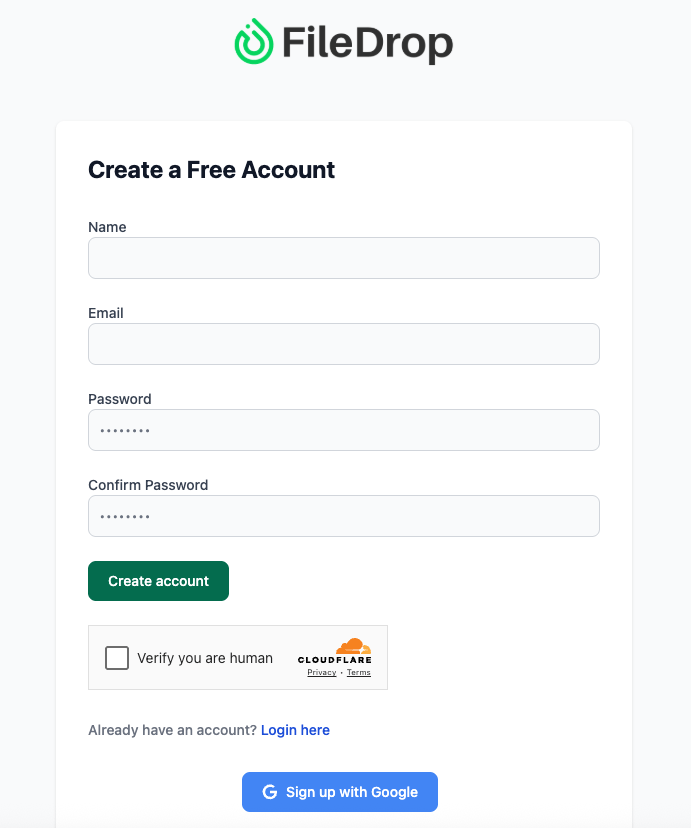
This is your main control panel where you can:
- Create and manage upload forms for employees
- Track submissions in real time
- Connect your Google Drive for automatic backups
- Monitor incoming files without using email
Everything you need to collect and organize HR documents is centralized in one dashboard.
Step 2: Go to the File Forms Dashboard
From the left-hand navigation menu, click File Forms.
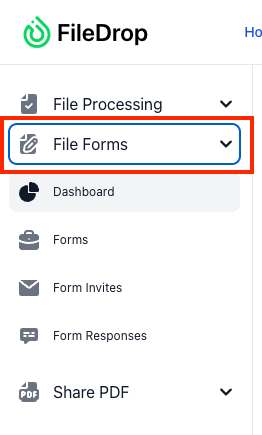
This is where you manage all of your HR upload forms. You can create separate forms for different HR processes like:
- New Hire Document Submission
- ID & Tax Form Collection
- Annual Certification Uploads
- Policy Acknowledgment File Submission
To begin, click New File Form to launch the setup screen.
Step 3: Configure Form Settings
Start by defining how your onboarding form should appear and behave.
Key settings to configure:
- Form Name – Example: “New Hire Document Upload – HR” This helps you easily manage multiple forms later.
- Description – Optional internal note to remind your HR team of the form’s purpose.
- Logo Upload – Add your company logo so employees recognize the form as official.
- Passcode Protection – Optional for HR forms. Useful if you want only invited employees to submit.
- Captcha & Notifications – Enable Captcha to prevent spam and turn on email notifications so HR gets alerts when new files arrive.
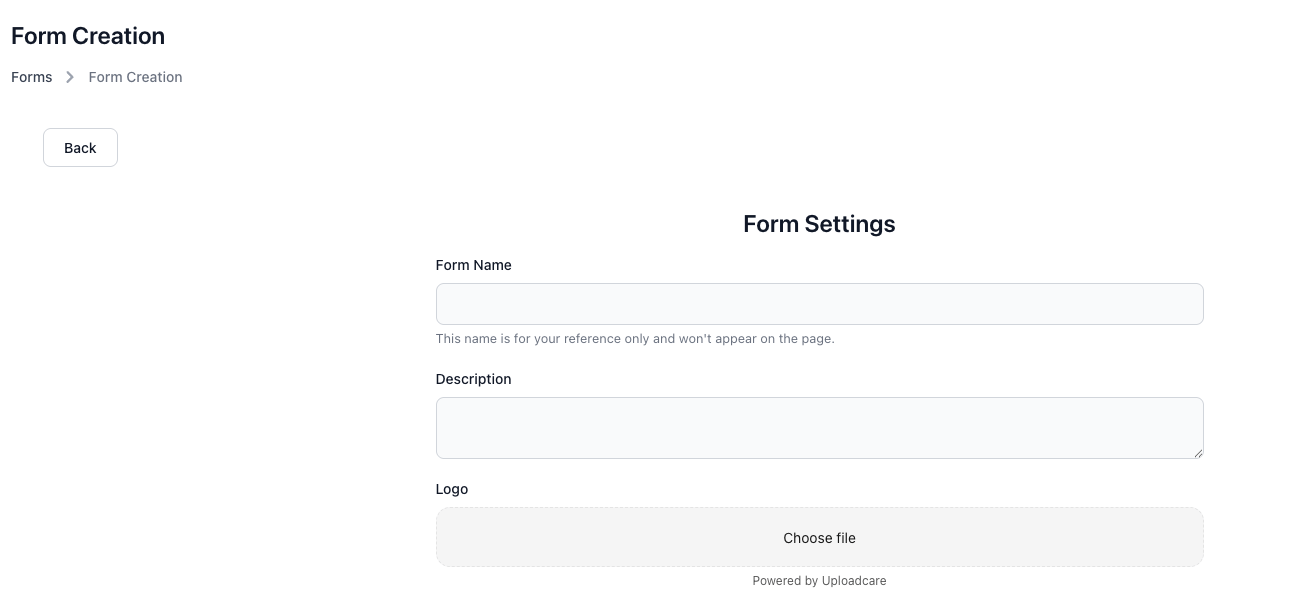
These settings ensure every submission is secure, branded, and easy to track.
Step 4: Enable Google Drive Integration
Instead of storing files manually, you can instantly route every upload to your Google Drive.
In the form setup, scroll to Google Drive Integration and click Connect Google Drive.
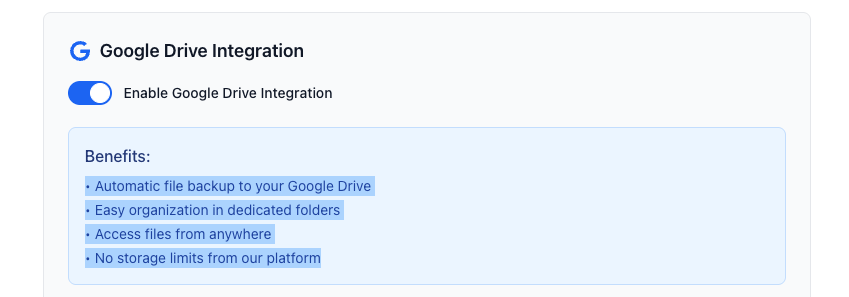
Once connected, choose a specific HR folder in Drive. This could be something like:
| Google Drive └── HR Documents ├── Onboarding Files ├── Employee Records └── Certifications |
From this point on, every file uploaded through the form will automatically appear in your Drive — no download or manual file transfer needed.
For HR teams that already live inside Google Workspace, this replaces complex Dropbox setups and messy email trails.
Step 5: Customize the Form Appearance & Fields
This is what new hires will see when they upload their documents.
Configure the following:
- Form Title – Example: “Secure New Hire Document Upload”
- Frontend Instructions – Clearly tell employees what to upload and reassure them it’s secure: “Please upload your signed contract, ID, and tax forms here. Files are securely transferred and stored in our HR Google Drive.”
- Brand Colors and Layout – Match your internal HR branding for consistency.
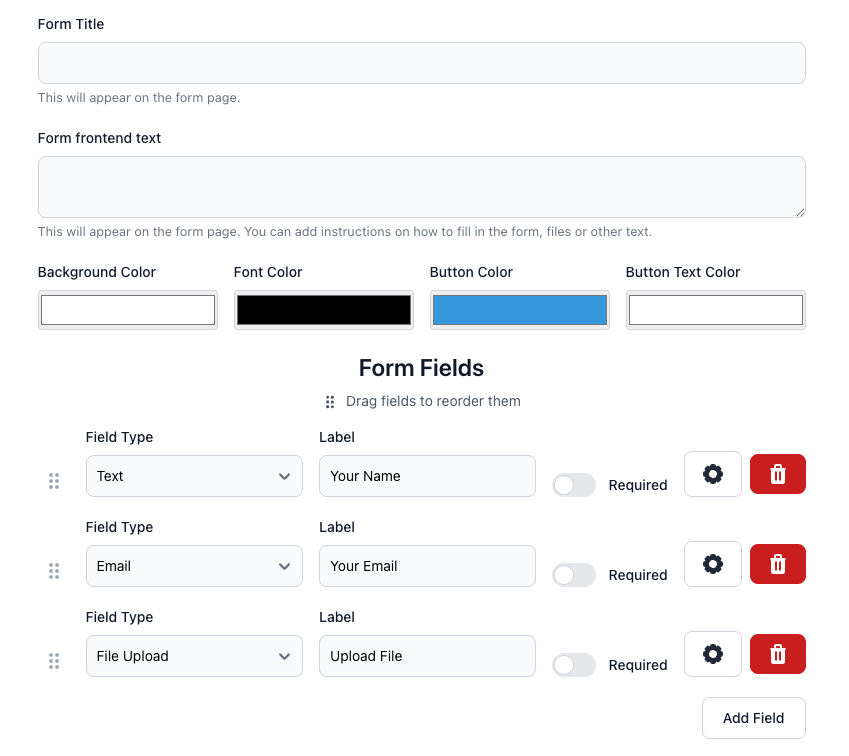
Then add the necessary form fields using the drag-and-drop editor. Recommended fields include:
- Full Name (required)
- Email Address (required)
- Department or Role (dropdown)
- Start Date (optional)
- File Upload – Enable multiple file uploads so employees can send all documents at once
- Notes/Comments – Optional field for clarification
This data helps FileDrop automatically name folders and organize uploads in a structured way.
Step 6: Activate and Save Your Form
Once everything is ready, toggle the form to Active and click Save.
If Google Drive wasn’t connected earlier, FileDrop will prompt you to complete the integration. When finished, your form is fully functional — ready to collect and auto-organize onboarding files.
From now on, every submission creates a new labeled folder in your Google Drive, containing the employee’s files along with their information.
After saving your form, FileDrop will generate a secure public link.You can share it with new hires through:
- Welcome emails
- Employee onboarding portals
- HR checklists
- Slack or Microsoft Teams messages
- Printable QR codes during orientation
New hires don’t need an account or login — they simply click the link and upload their documents.

This removes the need for email attachments, prevents lost files, and creates a standardized intake flow.
Free Google Drive Folder Structure Template (Copy & Use)
Use this template as a naming convention when linking your FileDrop folder:
| Google Drive └── HR Documents ├── New Hire Submissions │ ├── {Employee Name} – {Department} – {Start Date} │ │ ├── ID.pdf │ │ ├── Signed Contract.pdf │ │ ├── Tax Form.pdf │ │ └── Policy Acknowledgment.pdf |
Example after submissions:
| Google Drive └── HR Documents ├── New Hire Submissions │ ├── Maria Santos – Marketing – Feb2025 │ ├── John Reyes – Finance – Feb2025 |
This structure keeps everything consistent and searchable.
Optional: Sync Submissions to Google Sheets Automatically
For better HR tracking, FileDrop can automatically log every submission in Google Sheets. The sheet will include:
- Employee Name
- Department/Position
- Upload Date and Time
- Direct link to their Drive folder
This becomes a live onboarding tracker without any manual data entry.
Final Thoughts
Manual onboarding file collection wastes time and creates unnecessary stress. With FileDrop and Google Drive integration, HR teams can instantly organize every new hire document into a clean, well-structured folder system — without touching a single attachment.
Once set up, the system runs on its own — just send the link and let FileDrop handle the rest.
Frequently Asked Questions
1. Do new hires need a Google account to upload?
No, they simply click the upload link — no login required.
2. Are uploaded files secure?
Yes. FileDrop uses encrypted transfer and stores files directly in your private Google Drive.
3. Can I update the Drive folder later?
Yes. You can change the destination folder in FileDrop anytime. New uploads will follow the updated path.
4. Can multiple HR admins access the uploads?
Yes. As long as they have access to the Google Drive folder, they can review and organize files anytime.
The Bottom Line:
One keeps you awake. The other gets work done.
A month of coffee: $150
A month of FileDrop: $19
Why not have both?
