Do you ever feel like managing your pet’s care and expenses is a constant challenge? With a simple Google Sheets tracker, you can take control effortlessly.
Whether you have one beloved pet or a household full of furry companions, keeping all their health, food, and expenses in one organized place helps you stay prepared, stress-free, and financially smart.
Why Use Google Sheets as a Pet Care Expense Tracker?
Google Sheets is a powerful and free tool that makes tracking pet care expenses easy and accessible from anywhere. You can easily update data, use formulas to calculate spending, set reminders for vet visits, and even collaborate with family members.
Plus, since it’s cloud-based, you’ll never lose important records, ensuring you always stay on top of your pet’s well-being and budget.
Step 1: Create a New Google Sheet
Start by opening Google Sheets in your browser. Click the blank spreadsheet option to create a new document. Give it a name, like “Pet Care & Expenses Tracker,” so you can find it easily later.

Step 2: Set Up Your Main Categories
Your tracker should include different sections to cover all aspects of pet care. In the first row of your spreadsheet, create headers for the following columns:
- Date
- Category (food, grooming, vet visit, toys, training, etc.)
- Description
- Amount
- Payment Method (Cash, credit card, or another payment method)
- Notes

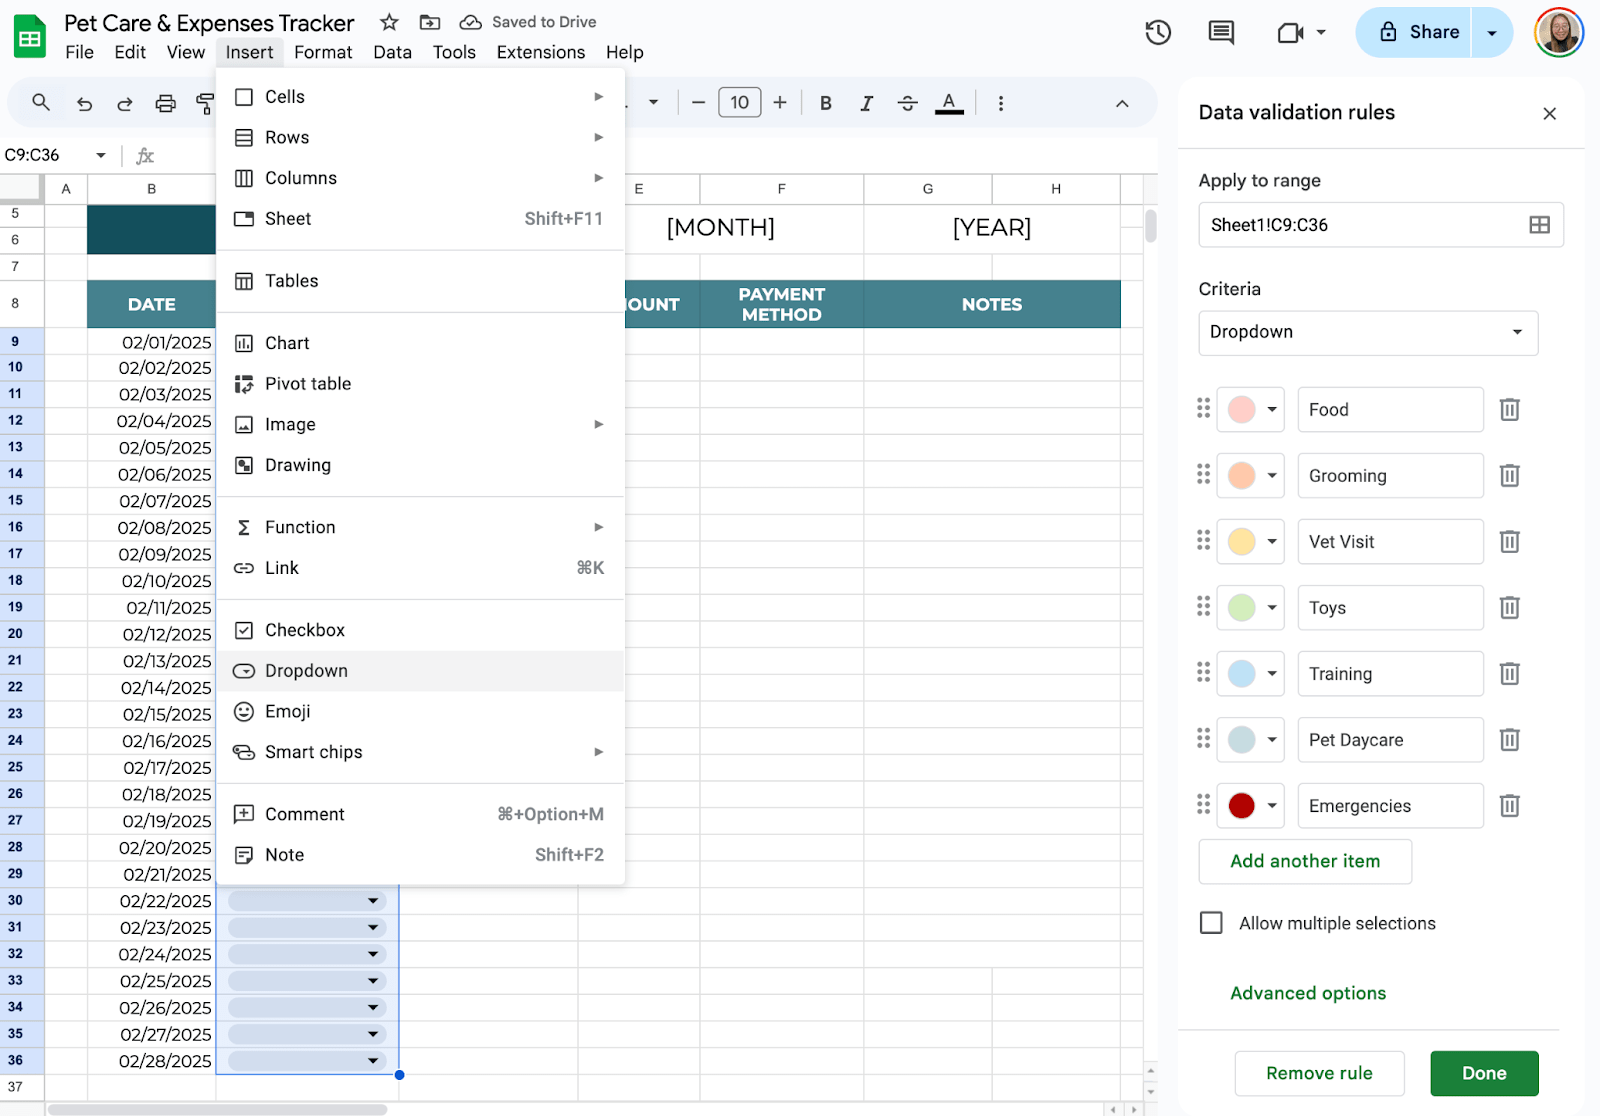
Step 3: Use Drop-Down Menus for Easy Input
To make data entry faster and more accurate, set up drop-down lists for categories like “Food,” “grooming,” “vet,” and more.
Click on the column where you want the dropdown list. Go to Insert > Dropdown in the top menu, and type in your choices (Food, Grooming, Vet, Training, etc.).
Now, when you enter data, you can simply pick from the list instead of typing manually every time.
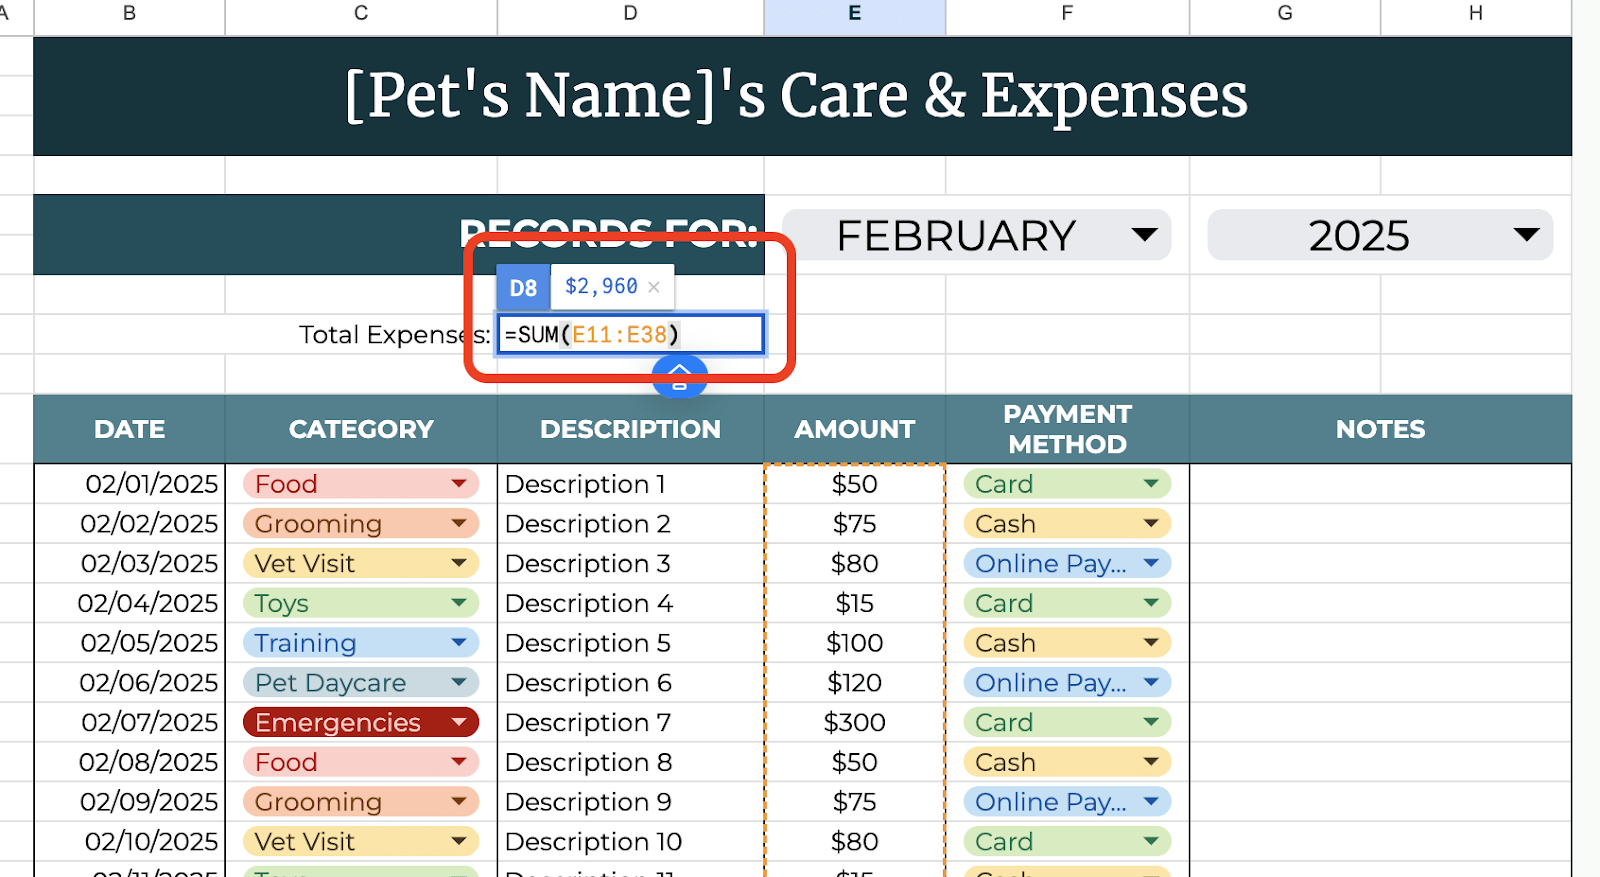
Step 4: Use Simple Formulas to Track Spending
Google Sheets can do the math for you! To see how much you’ve spent on pet care, click on an empty cell below the Amount column.
Type =SUM(E2:E100) (adjust the range as needed) and press Enter. This formula adds up all the expenses so you can see the total at a glance.
To track spending by category, click on an empty cell. Type =SUMIF(B:B, “Food”, D:D) to see how much you’ve spent on food. Replace “Food” with other categories as needed.

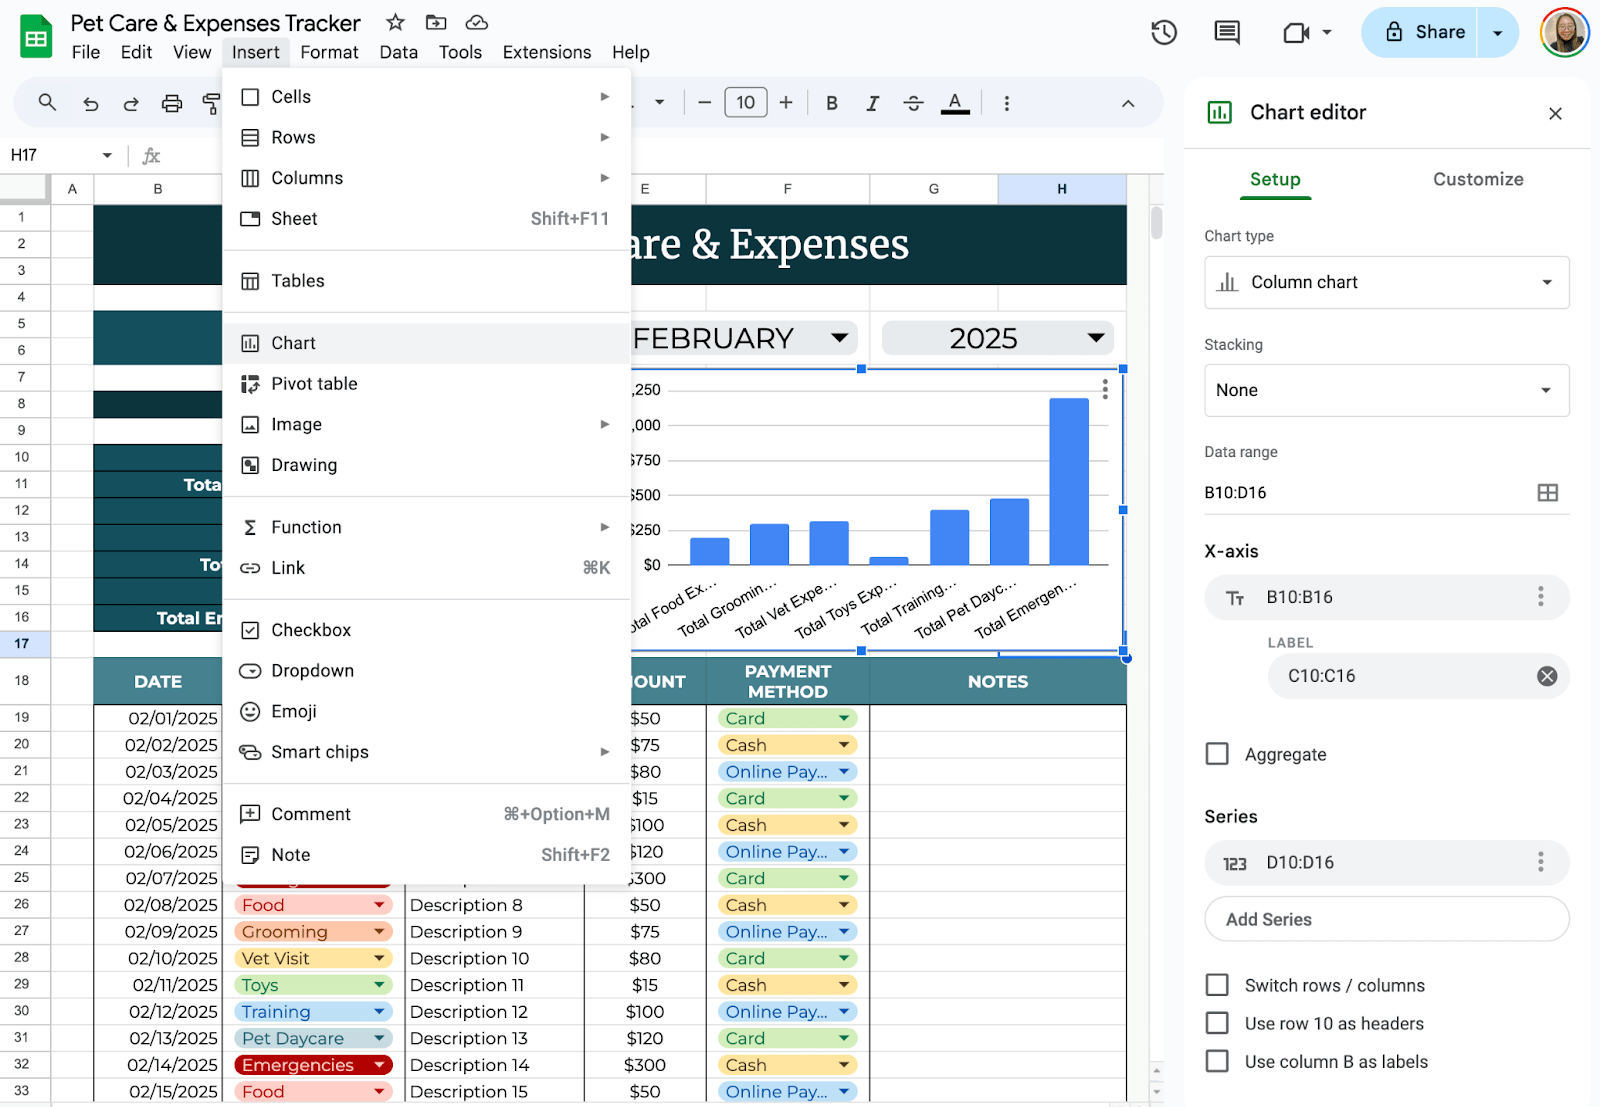
Step 5: Visualize Your Data
You may use Google Sheets’ Chart features to visualize your data. To add this in your tracker, simply select the information you would like to visualize, then select Insert > Chart. You may also customize your chart depending on your preferences.
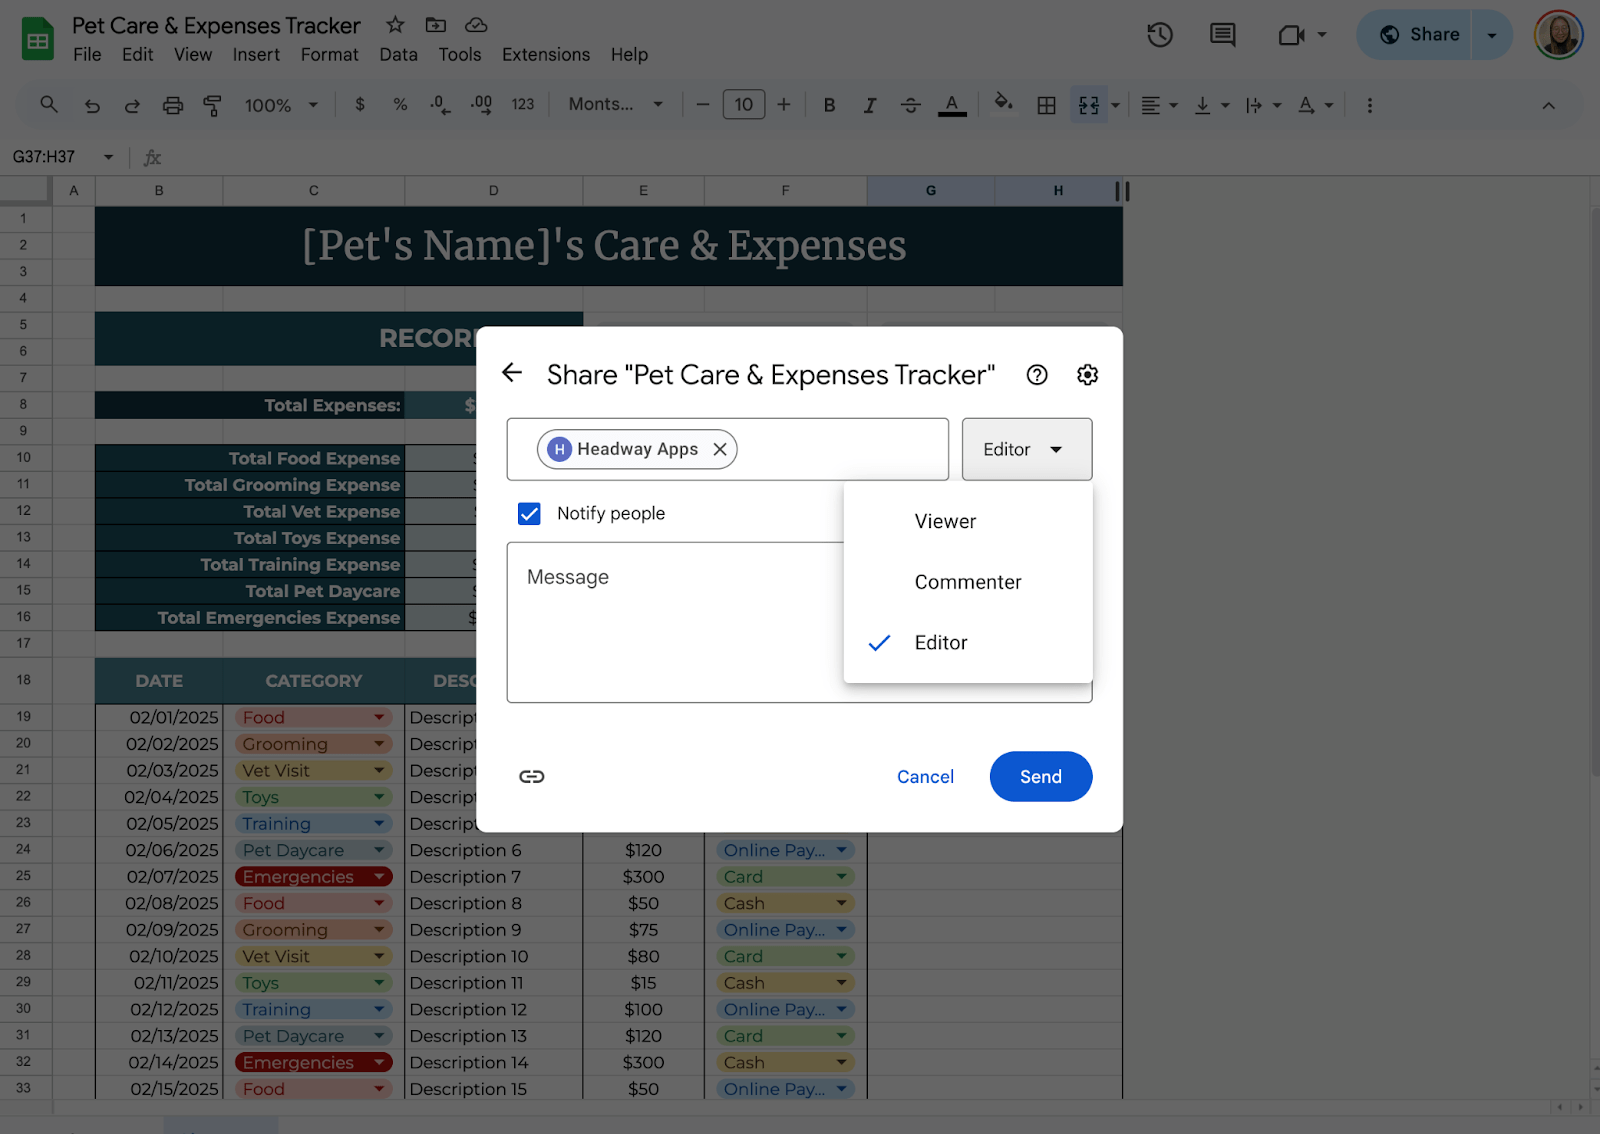
Step 6: Make It Accessible on Your Phone
To update your tracker on the go, download the Google Sheets app on your phone. Open your tracker anytime to log expenses or check upcoming appointments. Share the sheet with family members so everyone stays in the loop.
Get the Free Pet Care & Expense Tracker
Get a copy of the free Pet Care & Expense Tracker. I’ve populated some cells as examples, but you can customize them as needed.
Final Thoughts
Having a pet means more than just feeding them and taking them for walks—it’s about building a bond, understanding their needs, and making sure they’re happy and healthy.
Life gets busy, and it’s easy to forget small but important details like when their next vet visit is or how much you’re spending on their care.
That’s why a little organization can go a long way. Your pet depends on you, and by staying on top of things, you’re giving them the best life possible.
Frequently Asked Questions
What formulas can I use to calculate total expenses?
Use the SUMIF formula to calculate total expenses by category. For example: =SUMIF(CategoryRange, “Food”, AmountRange)
To calculate the total expenses across all categories, use the SUM formula: =SUM(AmountRange)
How can I visualize my data with charts?
Charts like bar graphs and pie charts help visualize expenses data. Highlight your data and select Insert > Chart. For yearly expenditure, a pie chart can show category distribution. For tracking over time, a line chart or bar graph works well for monthly expenses.
Can I protect certain parts of my tracker from editing?
Yes, by using the Protect Range feature. Select the range you want to protect, click on Data > Protected sheets and ranges. Define who can edit this range and add restrictions accordingly.

