A dropshipping business can sometimes feel overwhelming. Suppliers, shipments, and customer inquiries can pile up quickly. Wouldn’t it be great to have a simple system to keep everything organized?
Google Sheets is a powerful yet easy-to-use tool for tracking orders. It’s free, customizable, and accessible from anywhere.
How Can Google Sheets Help You with Your Dropshipping Business?
Google Sheets allows you to centralize order details, minimize errors, and track shipments in real time. Instead of scrambling through emails and supplier dashboards, you can have all your orders in one place with automatic updates and easy collaboration. It’s also accessible from any device, so you can manage your business on the go.
With Google Sheets, you can:
- Keep track of every order’s status without hassle
- Easily sort and filter data to find specific orders
- Automate calculations like estimated delivery dates
- Share the sheet with team members or virtual assistants
- Integrate with other tools for even greater efficiency
Step 1: Set Up Your Spreadsheet
First, open Google Sheets and create a new spreadsheet. Rename it something like “Dropshipping Order Tracker” so you can find it easily later.

Now, label the columns to include all the essential details of an order. Here are some useful ones to consider:
- Order Number
- Customer Name
- Product Name
- Supplier
- Order Date
- Tracking Number
- Shipping Carrier
- Order Status
- Estimated Delivery Date
- Notes
This will give you a clear overview of every order at a glance.

Step 2: Add Data Validation for Order Status
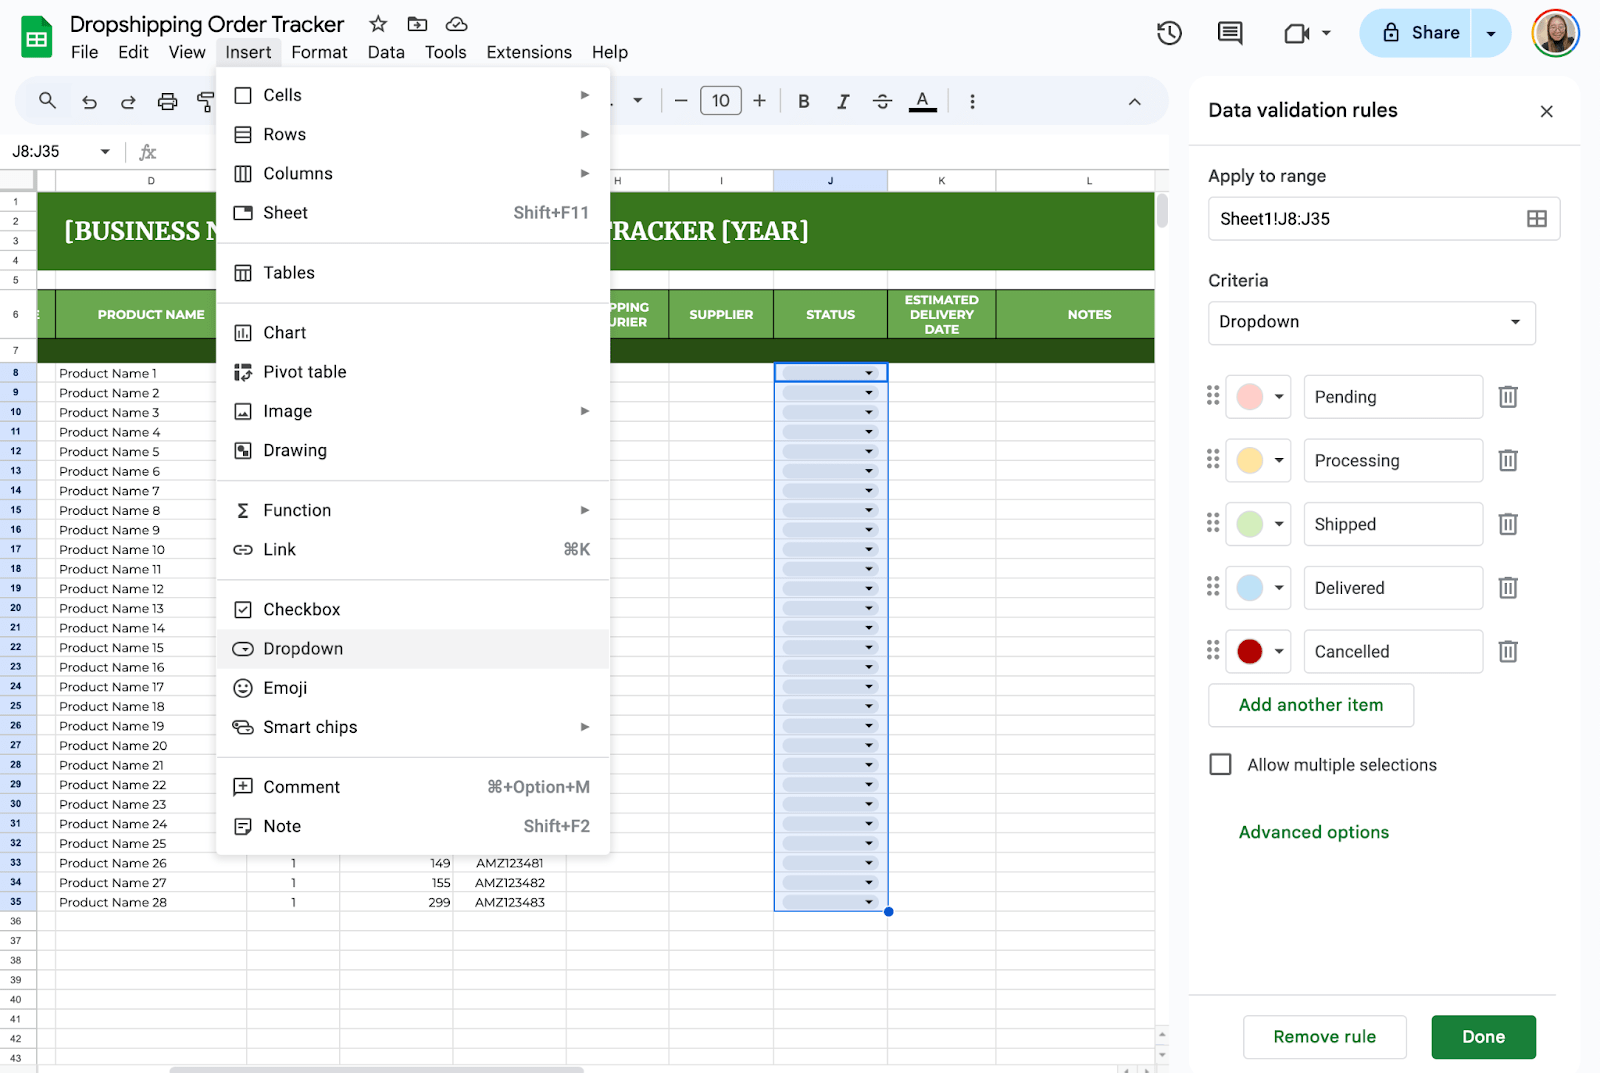
To make tracking easier, set up a dropdown list for the order status. This way, you can quickly update each order’s progress without typing manually every time.
Click on the first cell under the “Order Status” column.
Go to Insert > Dropdown, and enter options like Pending, Processing, Shipped, Delivered, Canceled. Click Save.
Now, every time you update the order status, you can select from the list instead of typing manually.

Step 3: Automate Delivery Date Calculation
Instead of manually calculating estimated delivery dates, let Google Sheets do the work. Click on the first empty cell under the “Estimated Delivery Date” column.
Type this formula: =B2+7 (assuming column B contains the order date and the delivery time is 7 days).
Press Enter and drag the formula down to apply it to all orders. Now, every time you enter a new order date, the estimated delivery date will auto-fill.

Step 4: Use Charts
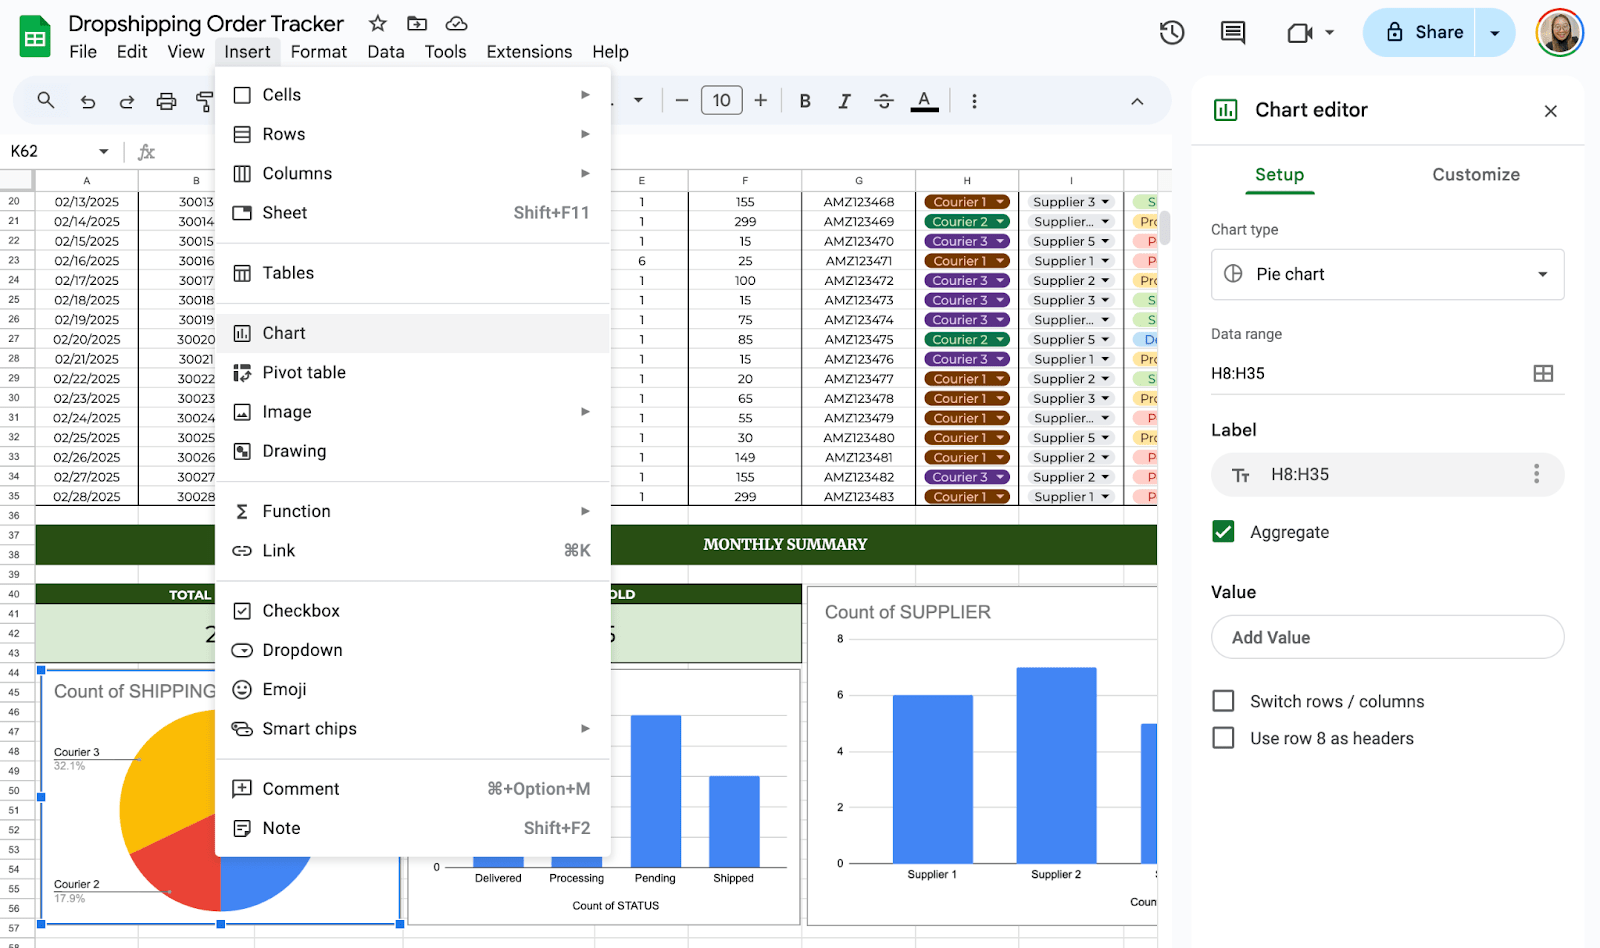
You can visualize your data using Google Sheets’ Chart features. All you need to do is select the data you would like to visualize then click Insert > Chart. You may also choose from different chart types and customize them depending on your preferences.

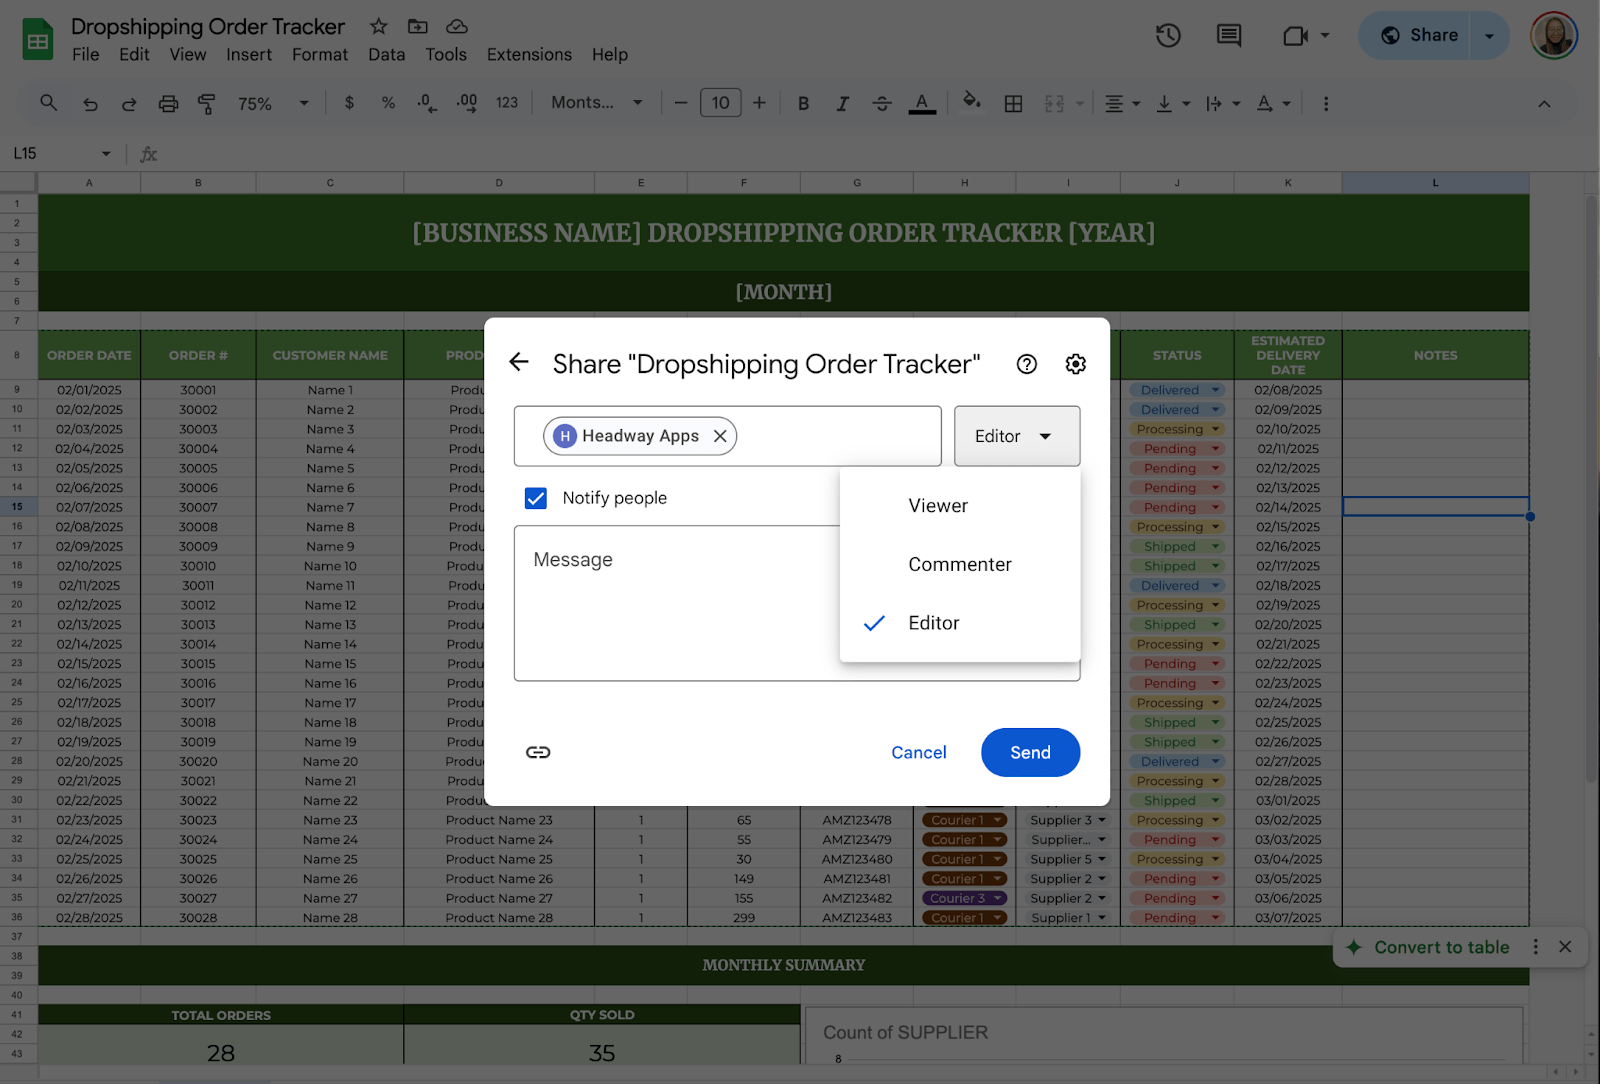
If you work with a team, sharing your order tracker is essential. Click the Share button in the top right corner and add email addresses of your team members. You can choose whether they can view, comment, or edit the sheet.

Get the Free Dropshipping Order Tracker
Get a copy of the free Dropshipping Order Tracker. I’ve populated some cells as examples, but you can customize them as needed.
Final Thoughts
An organized system can make all the difference in running a smooth dropshipping business. A clear and structured order tracker helps you stay in control, reduce mistakes, and create a better experience for your customers.
Think of it as your behind-the-scenes partner, keeping things in order so you can focus on what truly matters—growing your business and keeping customers satisfied. Adapt and refine your tracker as you go, and soon, it will become one of your most valuable tools.
Frequently Asked Questions
What formulas can I use to calculate profits and totals?
- Total Order Value: Use =SUM() to calculate the total cost of items in an order.
Example: =SUM(C2:C10) where C2:C10 contains item prices.
- Profit Calculation: Subtract costs from the selling price.
Example: =D2-E2 where D2 is the selling price and E2 is the cost price.
- Shipping Costs: Add a column for shipping costs and include it in the total order value.
Profit Margin: Use =(Profit / Selling Price) * 100 to calculate the profit margin percentage.
How can I track delivery dates and deadlines?
Use Date Functions like TODAY() to compare delivery dates with the current date. Example: =IF(F2<TODAY(), “Overdue”, “On Time”) where F2 is the expected delivery date.
Can I integrate tracking numbers and shipment updates?
Add a column for Tracking Numbers to input shipment details. Use Hyperlinks to link tracking numbers to carrier websites: Example: =HYPERLINK(“https://trackingwebsite.com/” & G2, “Track”) where G2 contains the tracking number.
The Bottom Line:
One keeps you awake. The other gets work done.
A month of coffee: $150
A month of FileDrop: $19
Why not have both?

