When clients send files — contracts, tax forms, proofs, or project documents — keeping them organized can quickly become overwhelming. Files arrive as email attachments, in multiple threads, or scattered across chat messages, creating security risks and endless manual sorting.
With FileDrop File Forms, you can create a secure upload form that automatically saves client submissions directly into your Google Drive — organized by folder, time, or client name. No manual downloading, no cluttered inboxes, and no storage limits.
In this guide, we’ll walk you through how to build a branded client upload form and connect it to your Google Drive so every submission is automatically backed up and neatly organized.
Why Businesses Need Automatic File Backup to Google Drive
File automation isn’t just convenient — it’s essential for modern client management. Here’s why:
- Eliminate manual file sorting: Every upload goes directly into the right Google Drive folder.
- Secure storage: Files are encrypted during transfer and automatically stored in your private Drive.
- Unlimited scalability: FileDrop doesn’t limit storage — your Drive handles capacity.
- Professional experience: Clients use a branded form that looks polished and secure.
- Instant collaboration: Team members can access uploaded files in real time.
Whether you’re in accounting, law, HR, or project management, automating your client uploads saves hours of administrative work every week.
Step-by-Step: Automatically Save Client Uploads to Google Drive
These steps will guide you in creating a FileDrop File Form that automatically routes client uploads to your connected Google Drive.
Step 1: Create Your FileDrop Account
Go to https://app.getfiledrop.com/register.
Sign up using your work email address for secure management and team access.
You can also sign in using your Google account — which makes connecting to Google Drive later seamless.
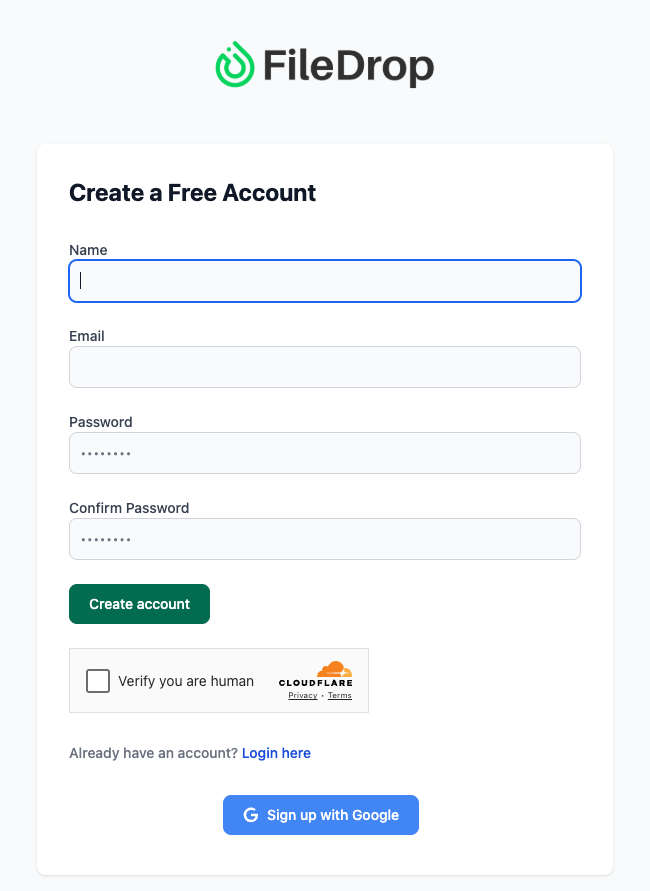
Once verified, log in to access your FileDrop dashboard.
Pro Tip: Use a dedicated email for business uploads like info@yourcompany.com or support@yourcompany.com. This keeps all incoming client files under one managed account.
Step 2: Access the File Forms Dashboard
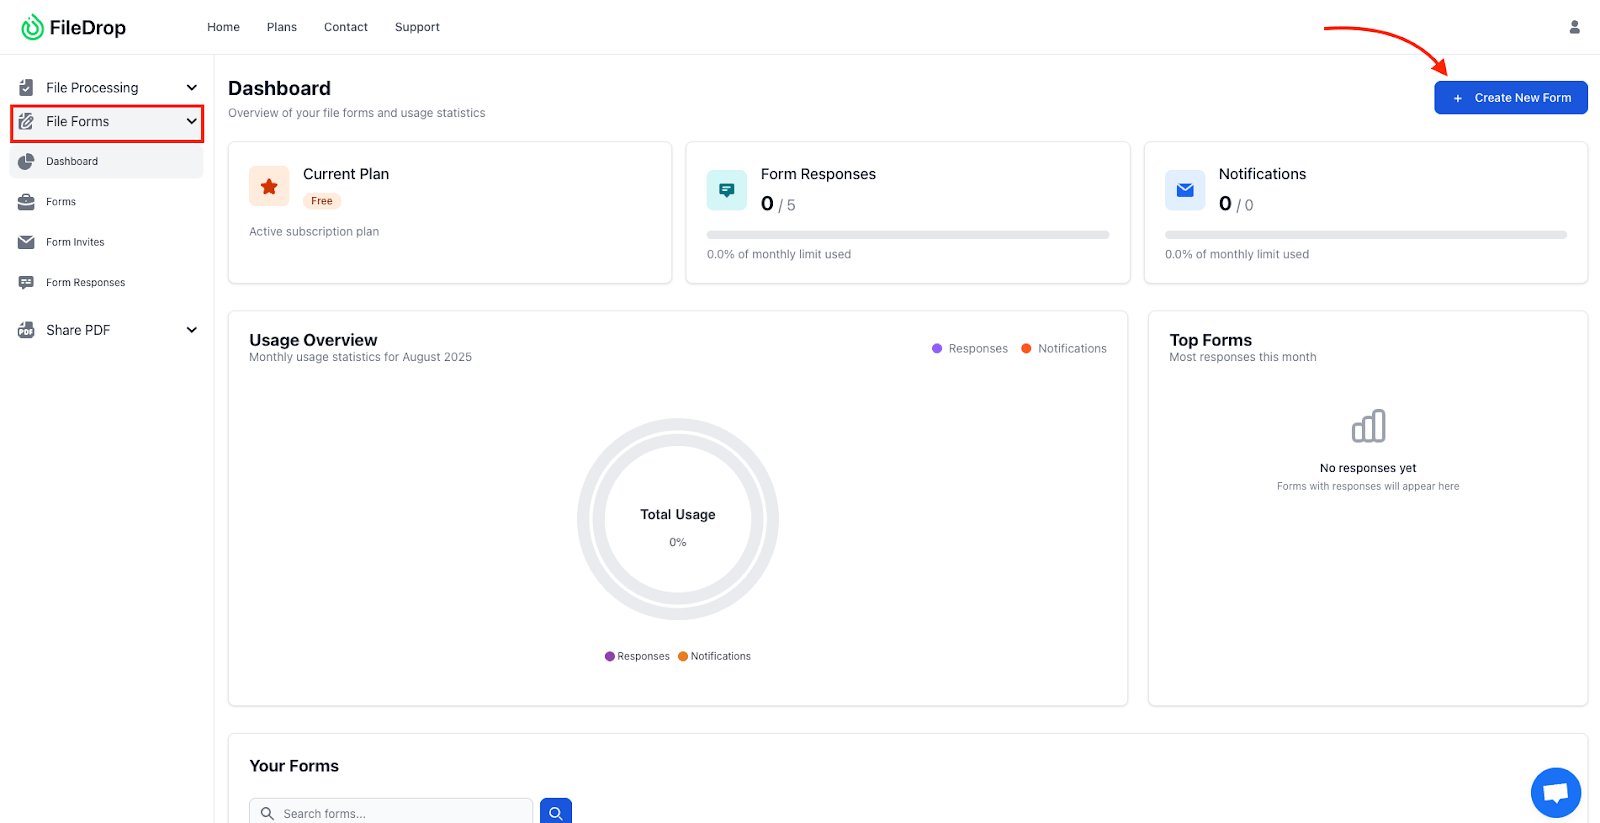
From your dashboard’s left-hand navigation menu, click File Forms.
This is your central place to create, edit, and manage upload forms. Each form can have its own destination folder and branding — ideal if you work with multiple clients or departments.
If this is your first form, you’ll see an empty dashboard. Later, you can create multiple upload forms for different use cases:
- “Client Document Upload”
- “Tax Form Submission”
- “Contract Review Upload”
Best Practice: Keep one form per client type or project category to maintain better organization in Google Drive.
Step 3: Create a New File Form
Click New File Form at the top right corner.
Give your form a clear, descriptive name that helps identify its purpose — for example:
- “Client Upload Form – Project Documents”
- “Tax Return Files – 2025 Season”
- “Legal Case File Submission Portal”
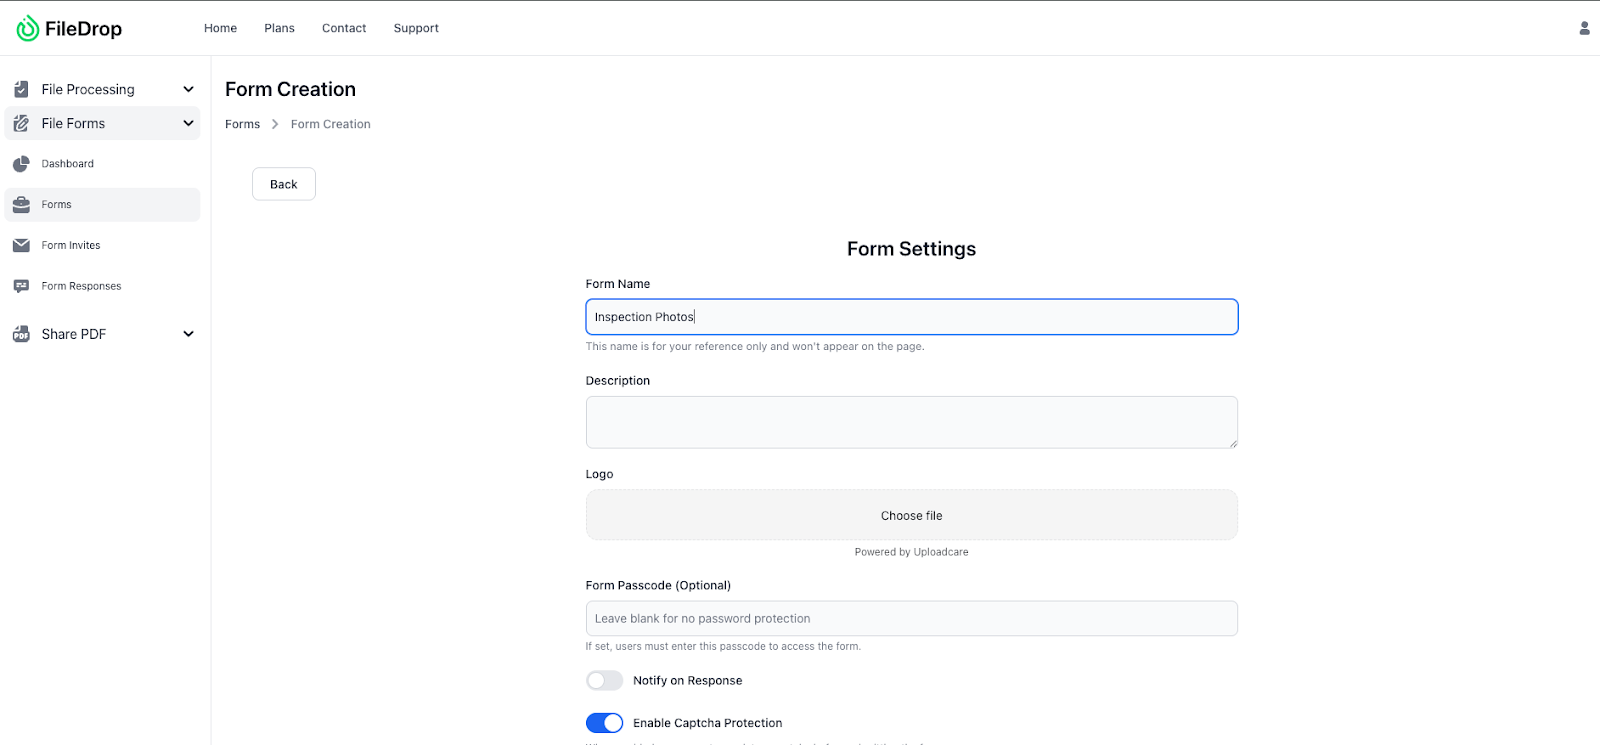
Enable Separate Submission Folders so that every client upload automatically creates a unique folder named after the submitter’s details.
Workflow Tip: This ensures that if multiple clients upload files simultaneously, each submission stays neatly separated and labeled in your Google Drive.
Step 4: Connect Your Google Drive
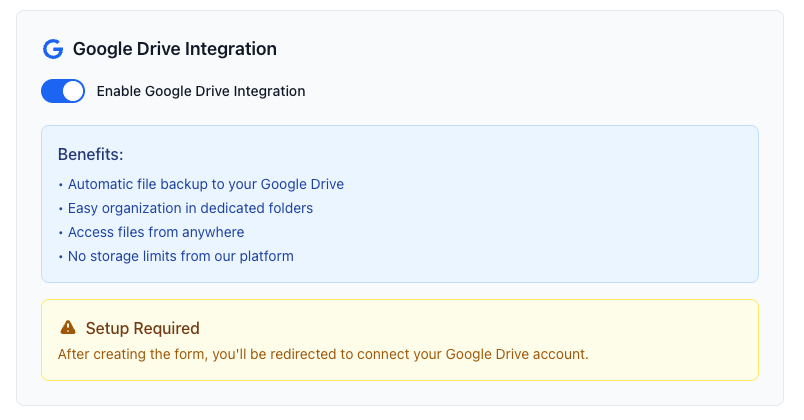
This is the most important step — linking your form to Google Drive for automatic saving.
- In your form setup screen, scroll to Google Drive Integration.
- Click Connect Google Drive and authorize FileDrop to access your account.
- Choose a specific Google Drive folder where you want submissions saved.
If you don’t already have a structure in place, create a Google Drive folder structure before linking, such as:
Google Drive
└── Client Uploads
├── Accounting Clients
├── Legal Clients
├── HR Documents
After connecting, every submission will be automatically sent to this folder — no downloads or manual uploads required.
Why This Matters:
- Files are stored instantly in your Drive.
- No storage caps from FileDrop.
- Accessible from anywhere, anytime.
- Securely encrypted during transfer.
Step 5: Add Form Instructions and Branding
This is where you make your form professional and client-friendly.
Add a headline and instructions to help users understand what to do:
- “Secure File Upload Form”
- “Use this form to submit your project files. All uploads are automatically stored in our Google Drive for safekeeping. No login required.”
Then, apply your company’s branding:
- Upload your logo.
- Match your button and header colors to your brand palette.
- Keep design consistent for trust and recognition.

Pro Tip: Clear branding reassures clients that their files are going directly to your company — not a third-party system.
When your form is ready, it’s time to share it. FileDrop provides a public link you can distribute in multiple ways:
- Embed it on your website for easy client access.
- Include the link in emails or invoices.
- Share via Slack, Microsoft Teams, or CRM messages.
- Add a QR code on printed materials for mobile uploads.
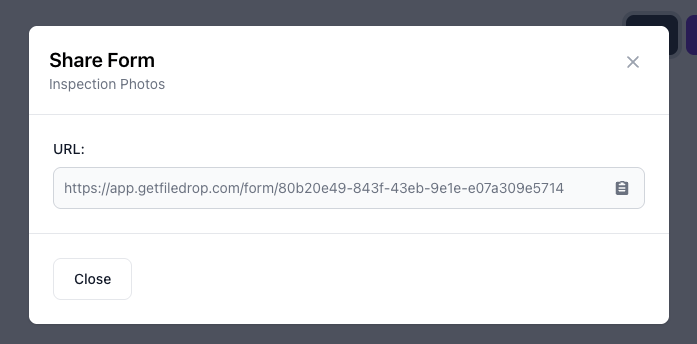
Tip: Always include a short note explaining the form’s purpose, such as: “Please use this secure link to upload your project documents directly to our Drive.”
Step 7: Review and Manage Submissions
Once clients start uploading, FileDrop automatically sends all files to your linked Drive.
If you enabled Separate Submission Folders, you’ll see each submission in its own subfolder named with the client’s details. You can open Drive anytime to review, move, or share the files internally.
Efficiency Tip: Use Drive’s search filters (by name or date) to instantly locate specific client folders or uploads.
Step 8: Sync Form Data to Google Sheets (Optional)
If you’d like to maintain a live record of all submissions, connect your form to Google Sheets.
Here’s how:
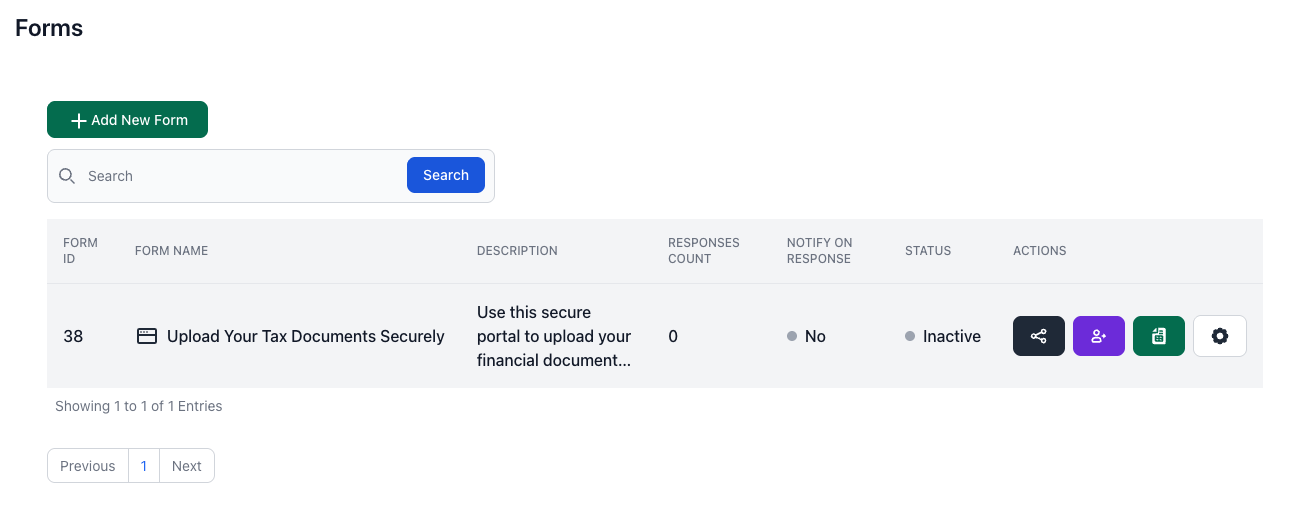
- On your FileDrop dashboard, find your client upload form.
- Click the Google Sheets icon beside it.
- Confirm when prompted.
FileDrop automatically generates a Google Sheet that includes:
- Client Name and Email
- Upload Date and Time
- Document Type
- Direct file link to the uploaded document in Google Drive
Now you have a complete, automatically updated log of all submissions — no manual tracking needed.
Real-World Example: Agency File Management
A marketing agency uses FileDrop to collect creative assets from clients. Each client fills out a simple “Upload Your Project Files” form, and FileDrop automatically creates a new Drive folder for every submission.
The agency’s team instantly sees uploaded logos, campaign briefs, and content materials in their shared Google Drive — perfectly organized and ready for use.
No more chasing emails or re-uploading files — just a clean, automated system that saves hours weekly.
Conclusion: Simplify Client File Collection Forever
Manual file collection is outdated. With FileDrop and Google Drive integration, every client upload is instantly organized, securely backed up, and ready for collaboration.
Your clients get a seamless upload experience — and your team gets a clutter-free, automated workflow. Start saving time and securing your uploads today with FileDrop.
Frequently Asked Questions
1. Can clients upload multiple files at once?
Yes. FileDrop supports multiple uploads in a single submission — ideal for sending complete project folders or packages.
2. Do clients need a Google account to upload files?
No. Anyone with your FileDrop link can securely upload files, even without logging in.
3. Are uploads encrypted and secure?
Absolutely. All files are encrypted during transfer and safely stored in your connected Google Drive.
4. What happens if I change my Google Drive folder later?
You can update your destination folder anytime in the File Form settings, and new submissions will go there automatically.
The Bottom Line:
One keeps you awake. The other gets work done.
A month of coffee: $150
A month of FileDrop: $19
Why not have both?
